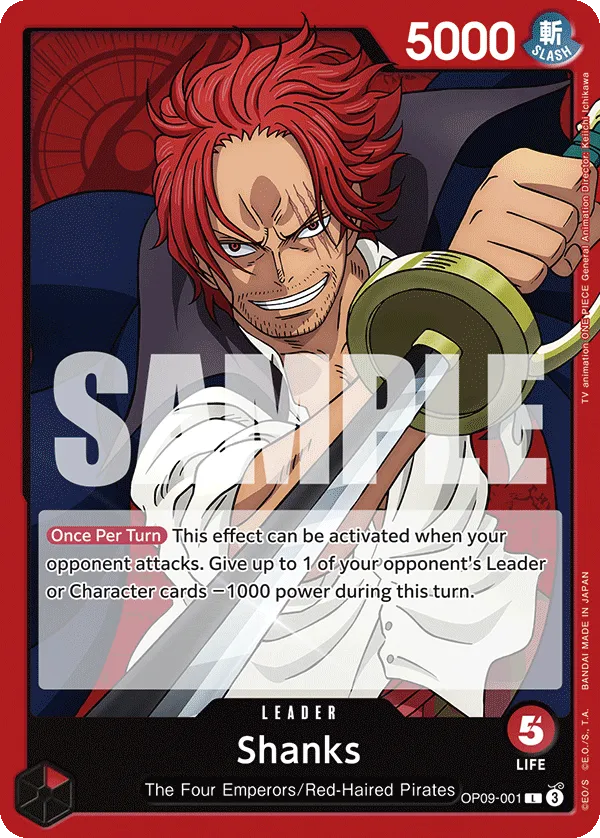
Red Shanks has been dominating the OP09 meta, quickly rising as the strongest of the six new Leaders. Traditionally, red decks are known for their fast-paced aggression, aiming to overwhelm the opponent’s Leader and win games as fast as possible. However, Red Shanks takes a different approach, focusing on removing the opponent’s Characters to establish board control.
Leader
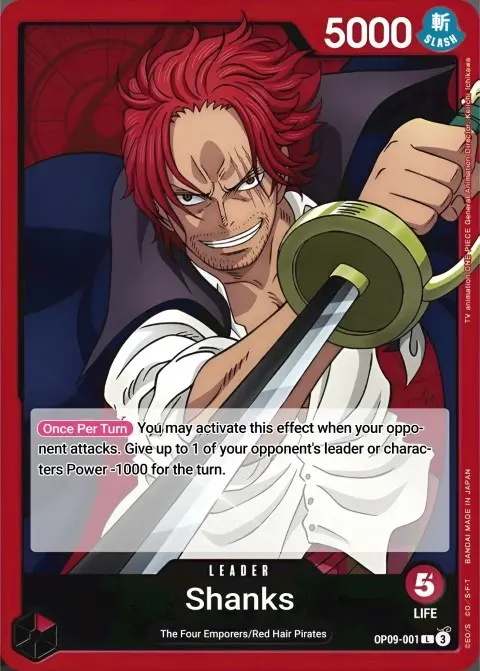
Shanks is a defensive Leader, reducing the Power of one of your opponent’s attackers by 1,000 when they go for the attack. This prevents 5,000-Power attackers from damaging your Leader and reduces the need to use Counter resources when defending against attacks.
Red Shanks Decklist
How to Play
The Red Shanks deck focuses on controlling the field by KOing opponents’ Characters and weakening their overall offense. Simultaneously, it develops powerful Characters like 8-cost Silvers Rayleigh and 10-cost Shanks, which can be challenging for opponents to handle. Multiple attacks from these heavy hitters can eventually win you the game.
Rather than going all-out aggressive with the Red deck, this strategy relies on the Leader’s effect to slow down the opponent’s tempo, aiming for a late-game takeover by high-cost Characters. The deck’s multiple KO-effect Characters help shift board control in your favor.
Early Turns
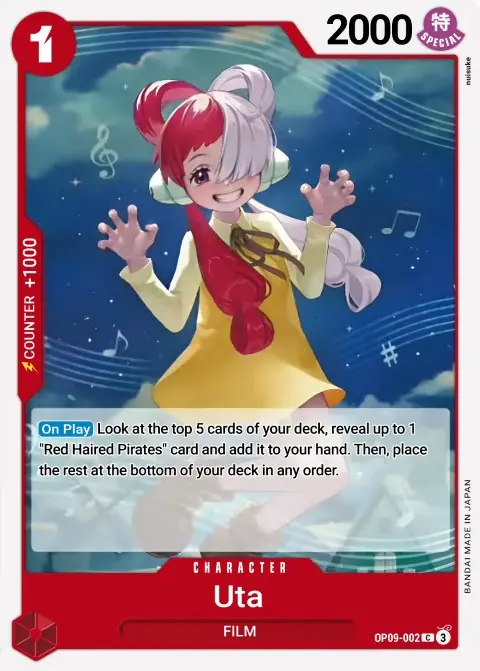
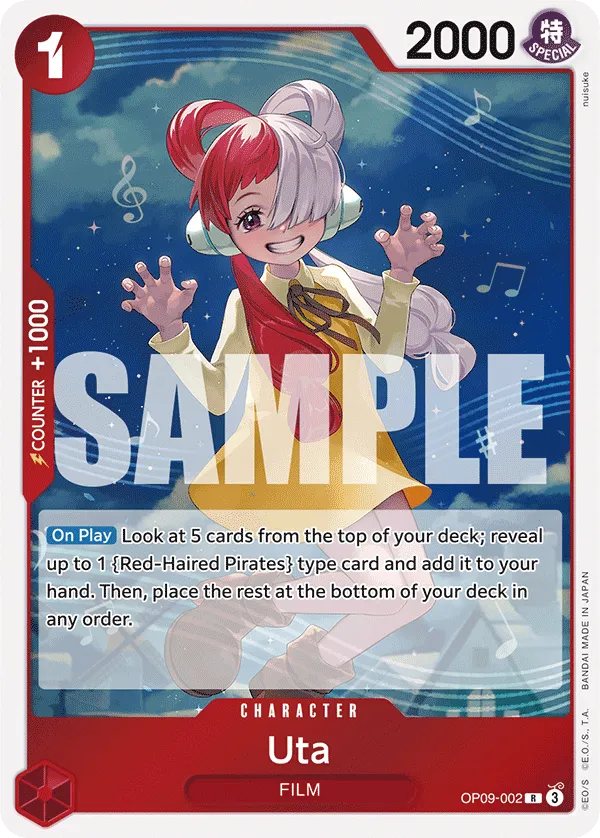
Uta is an early-game searcher used to find a {Red Haired Pirates} card to play on the upcoming turns.
Mid-game Plays

The mid-game has multiple Characters that can help us slow down the opponent’s aggression and even set up control plays.
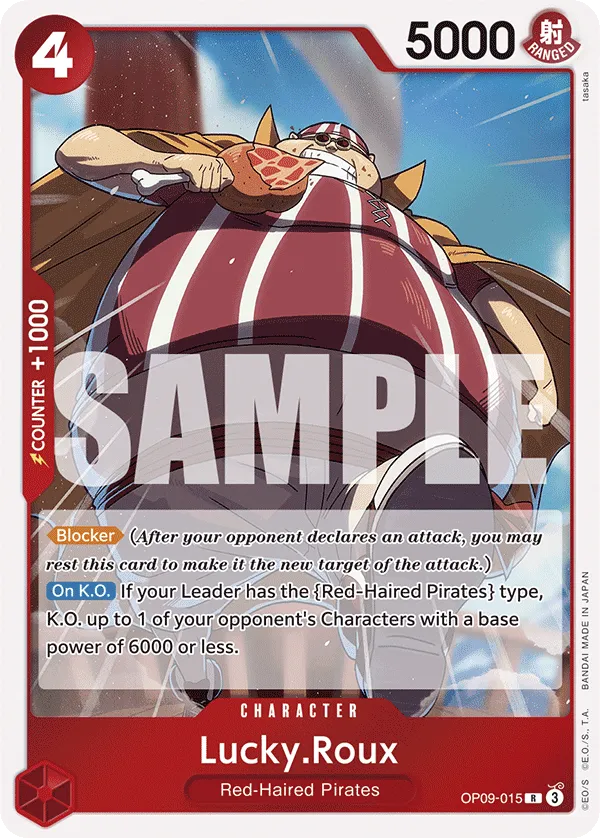
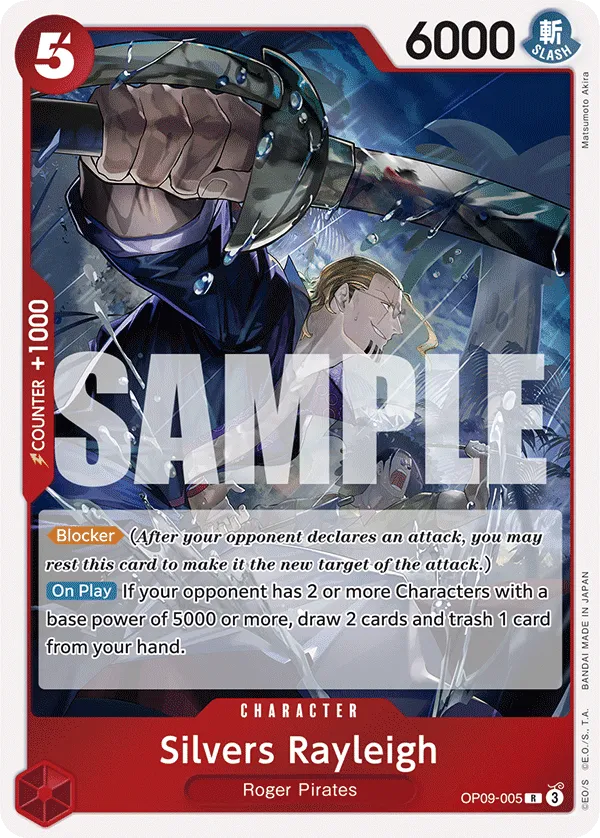
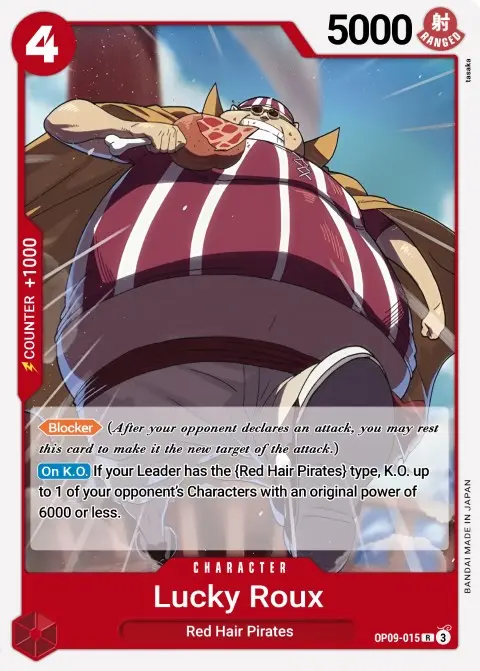
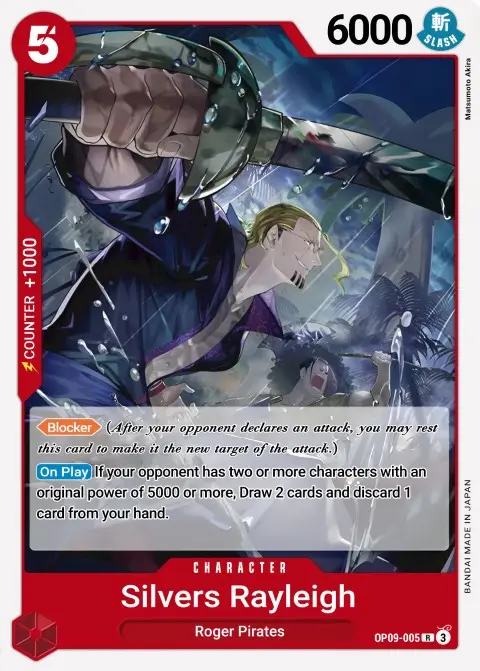
Lucky Roux and Silvers Rayleigh are key blockers that can protect the Leader when needed. When KO’d, Lucky Roux can KO a 6,000-Power Character. Since Lucky Roux is a blocker, you can control when he’s KO’d, using his ability to block an attack and KO one of your opponent’s Characters at the best moment.
Silvers Rayleigh, on the other hand, draws 2 cards and trashes 1 if there are two 5,000-Power or more Characters on your opponent’s field.
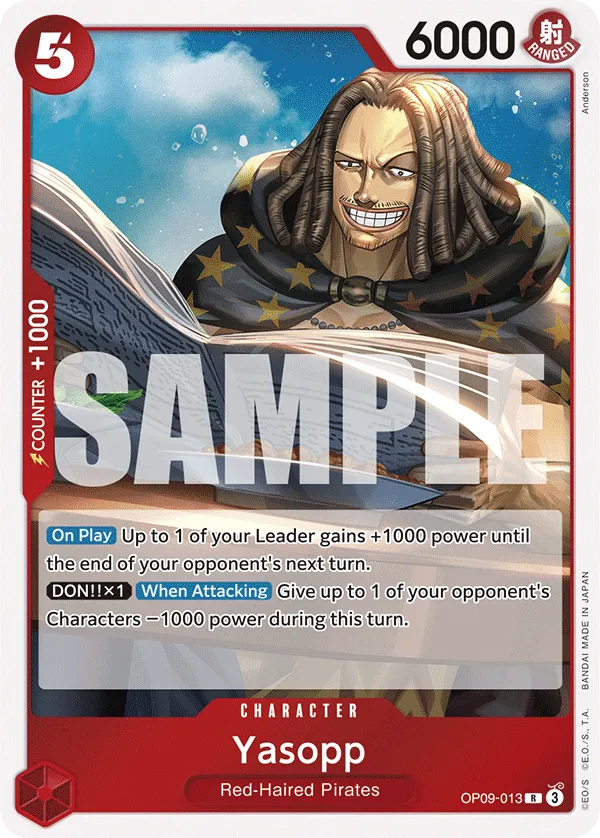
Yasopp offers protection for Leader Shanks in a different way, providing a +1,000 Power that stays active during the opponent’s attack turn, making it easier to Counter attacks. Additionally, Yasopp weakens an opponent’s Character by -1,000 Power whenever he attacks, making him a persistent nuisance if left on the field.
7-cost Control Options

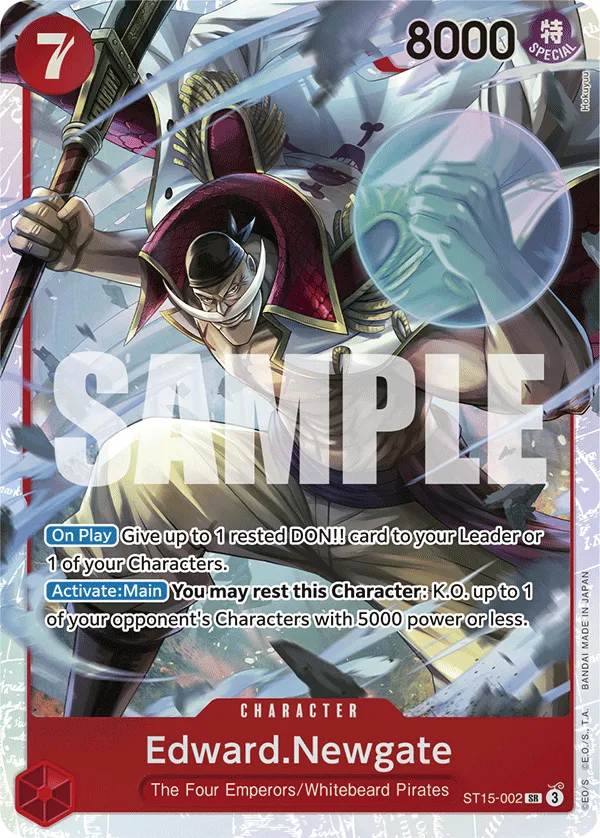
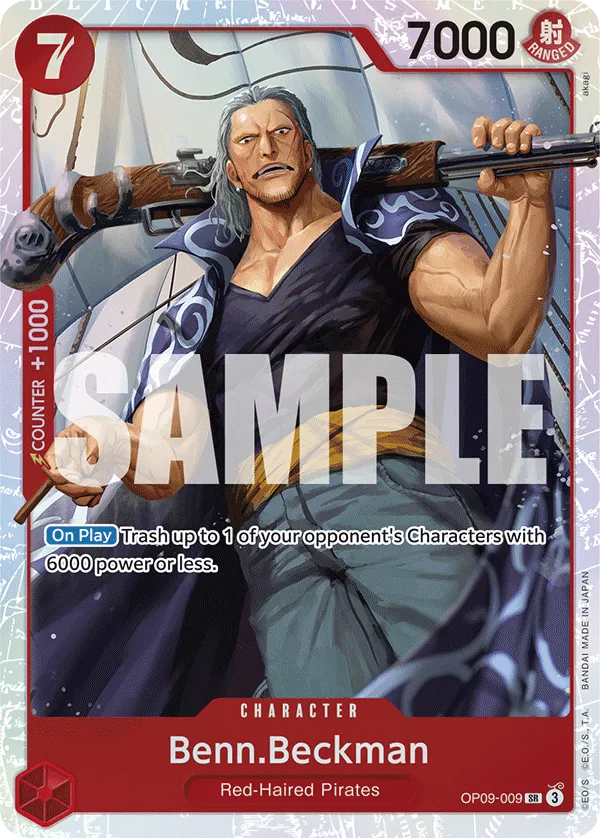
On Don 7, you can choose to play either Edward Newgate or Benn Beckman, each with their own strengths.
If you need to KO a 5,000-Power Character, Edward Newgate is the better option. He has 8,000 Power, making him a more significant threat than Benn Beckman, and the fact that he lacks a Counter effect means we’d rather him in play. Additionally, Newgate grants a rested Don to your Leader or one of your Characters, which can synergize with Yasopp to KO a 6,000-Power Character.
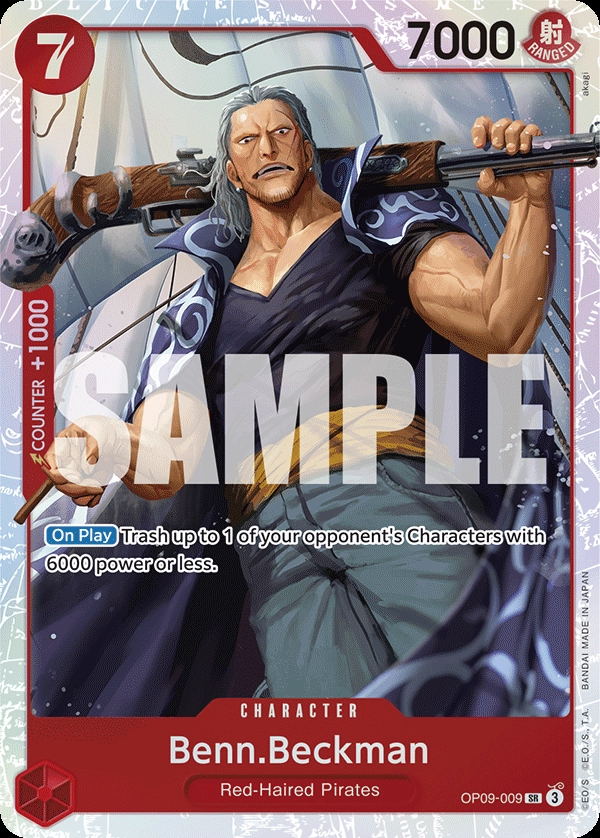
Benn Beckman, on the other hand, has 7,000 Power and trashes rather than KOs, making him a strong counter to cards like 5-cost Sabo or 4-cost Borsalino. He can trash a Character with 6,000 Power or less, allowing him to hit stronger targets than Edward Newgate.
Don 8 Plays
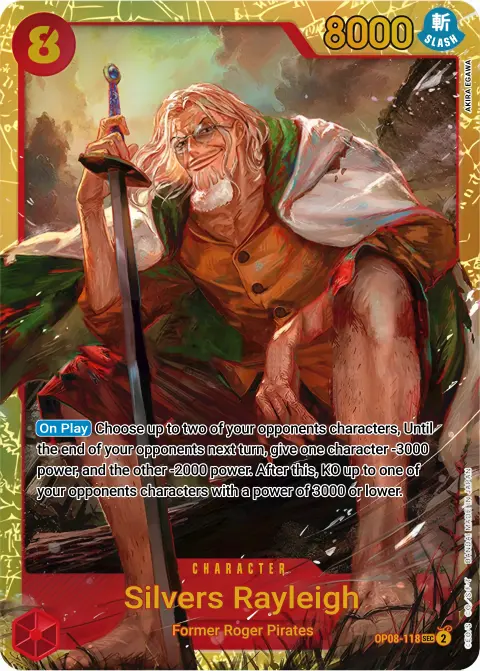
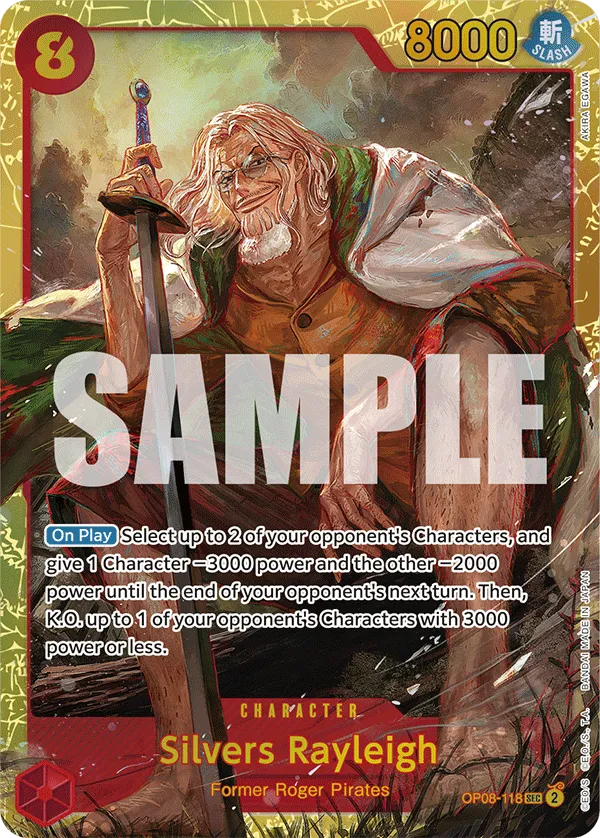
Silvers Rayleigh is one of the top control Characters, reducing the Power of two of your opponent’s Characters by -3,000 and -2,000. This puts one Character in range of Rayleigh’s KO effect, while the other becomes vulnerable to your attackers if it’s rested. The Power reduction lasts until the end of your opponent’s next turn, so even if the second Character isn’t KO’d, it won’t be as threatening offensively.
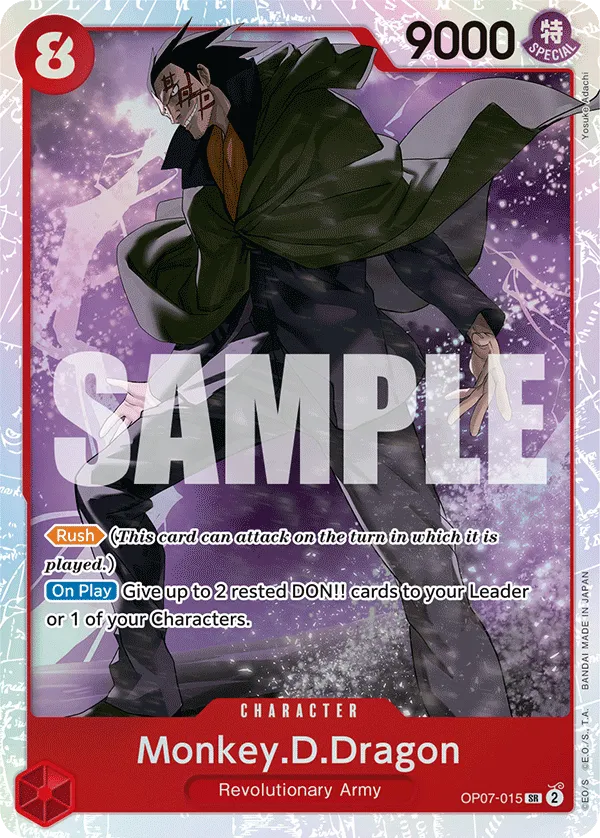
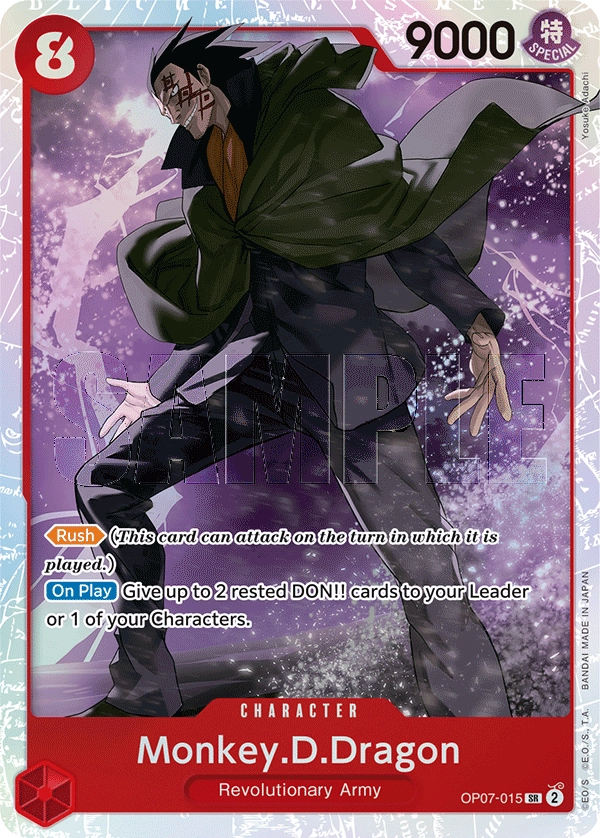
Monkey D. Dragon is a Rush attacker, primarily used to ramp up the aggression. The two rested Don he provides to your Leader or a Character enables an extremely aggressive turn, allowing you to maximize your offensive potential.
Power Reduction
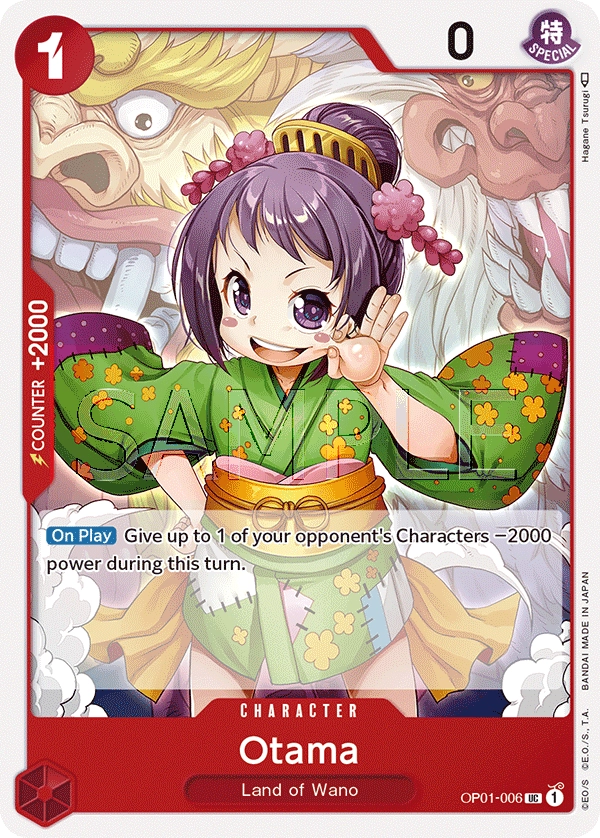
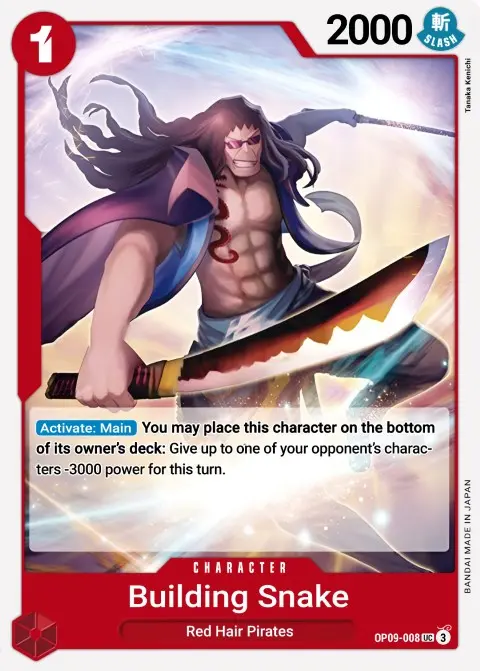
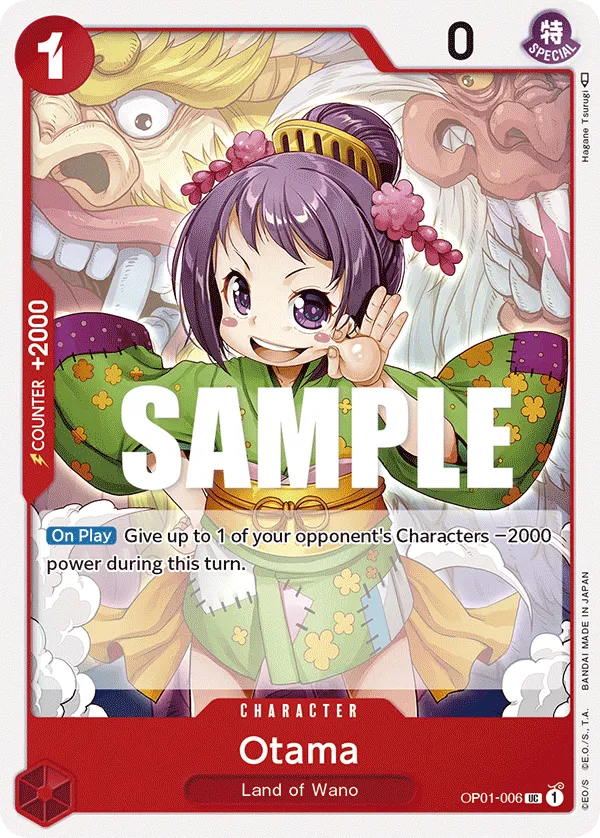
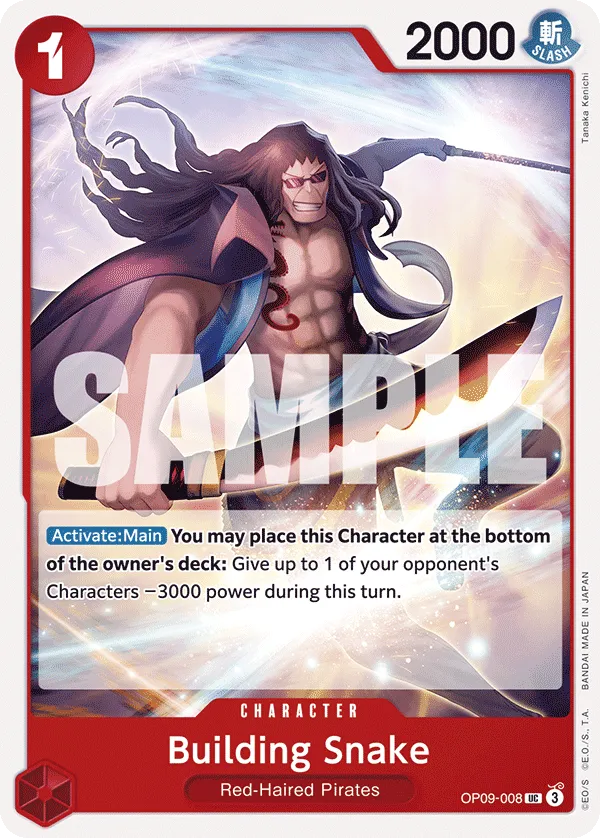
Otama and Building Snake are 1-cost power reducers that make it easier to attack and KO a rested Character or bring it within range of your KO effects.
While Otama is typically more useful as a +2,000 Counter, she can still provide field control when needed.
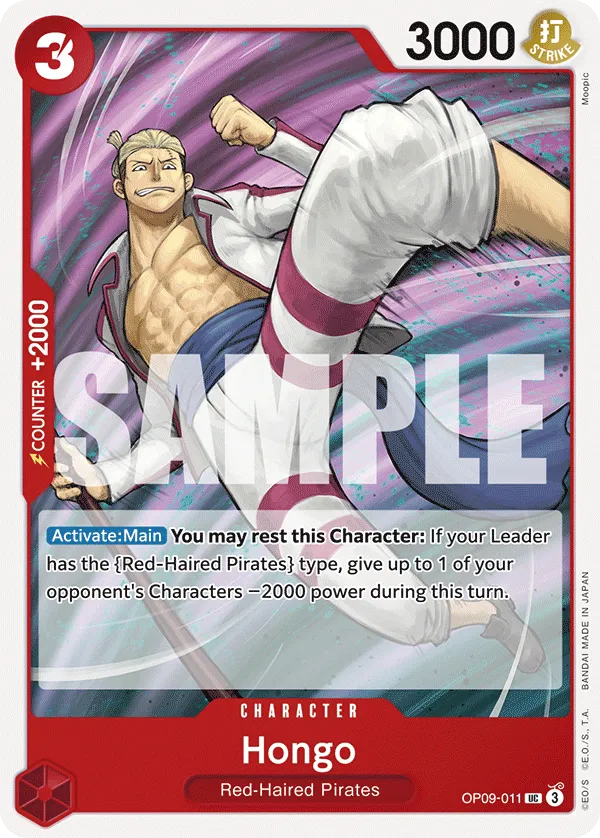
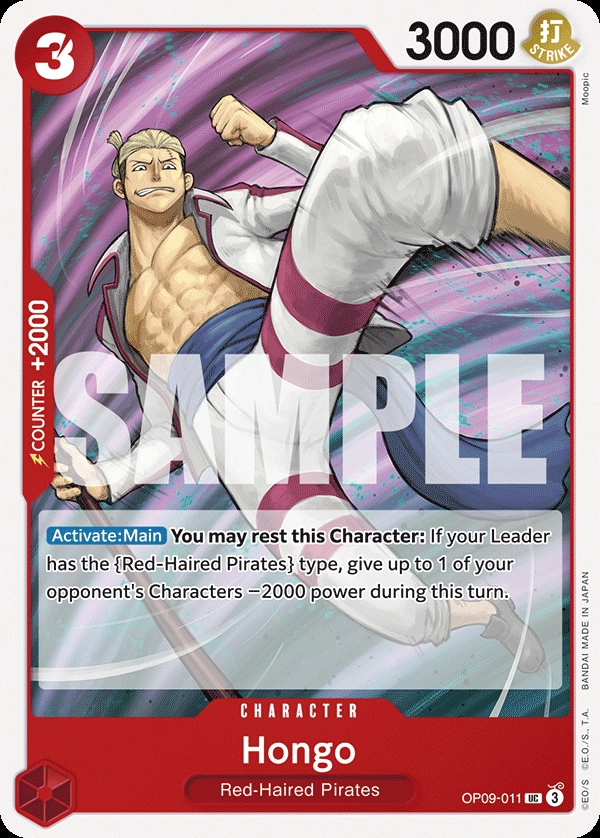
Hongo can be played on turn 2 and left on the field until his -2,000 Power effect is needed. To activate his effect, you have to rest Hongo, so he will become vulnerable to opponents’ attackers. If you have a blocker, you could potentially protect him to keep reusing his cost-reduction later in the game. However, in most cases, you’ll Hongo for his +2,000 Counter.
Late-game Characters
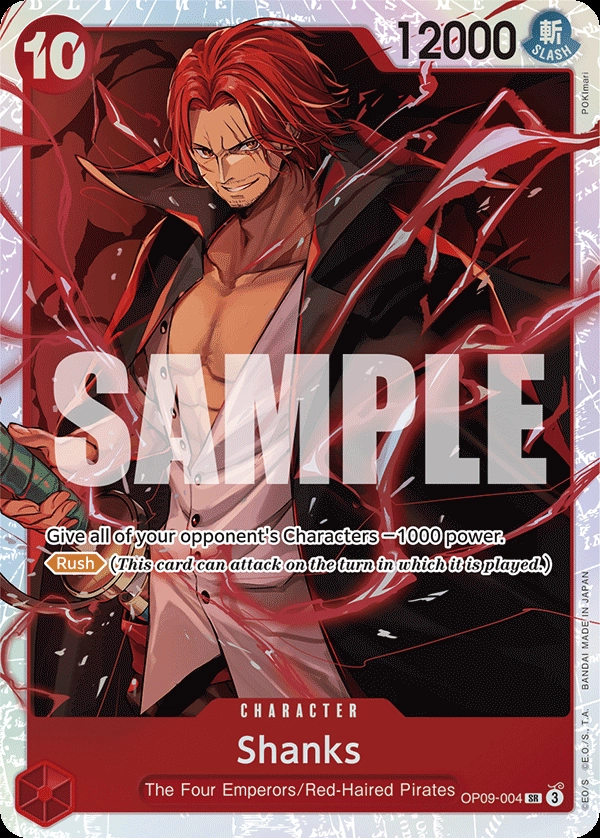
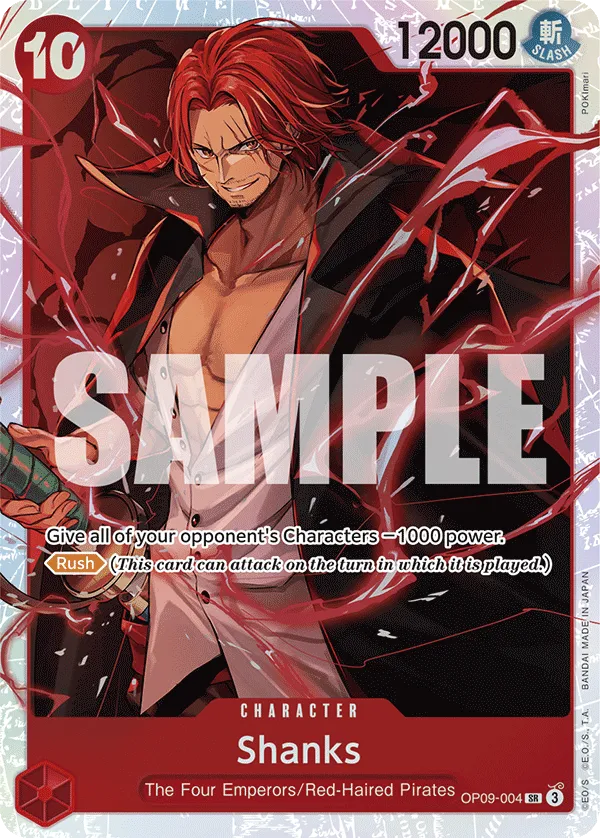
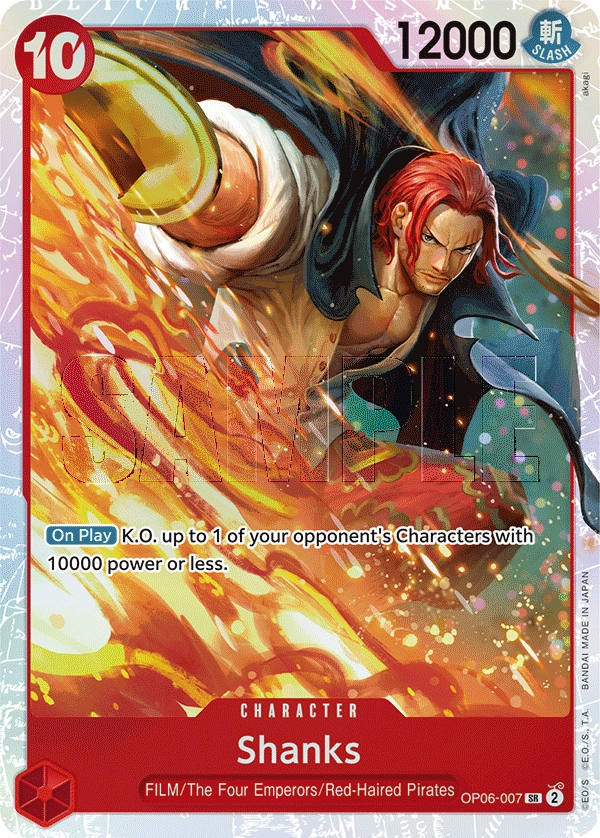
We want to play 10-cost Shanks as early as possible, especially when the opponent has multiple Characters on the field. His -1,000 Power reduction to all enemy Characters weakens their offense and helps save Counter resources, while also making it easier to KO high-Power Characters on your next turn.
Additionally, Shanks has Rush, allowing you to immediately use his 12,000 Power to KO a rested Character or go straight for the opponent’s Leader.
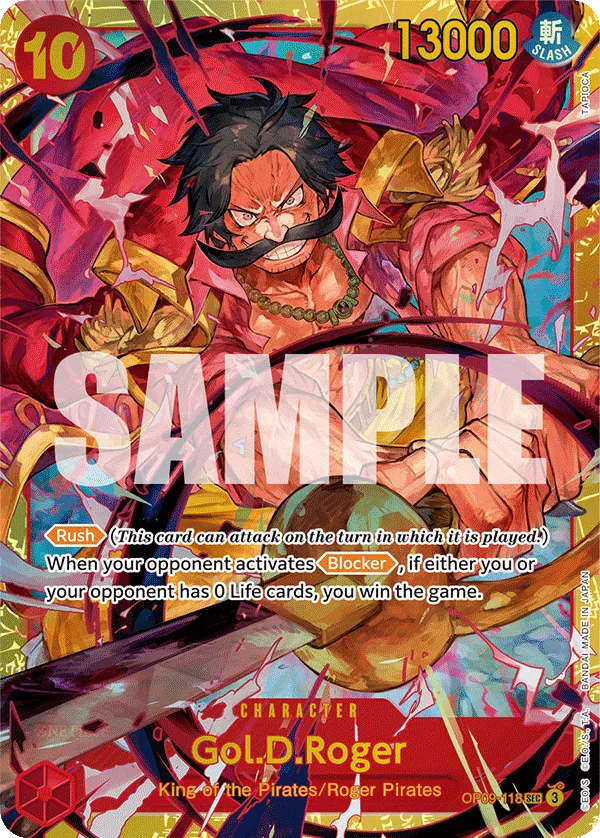
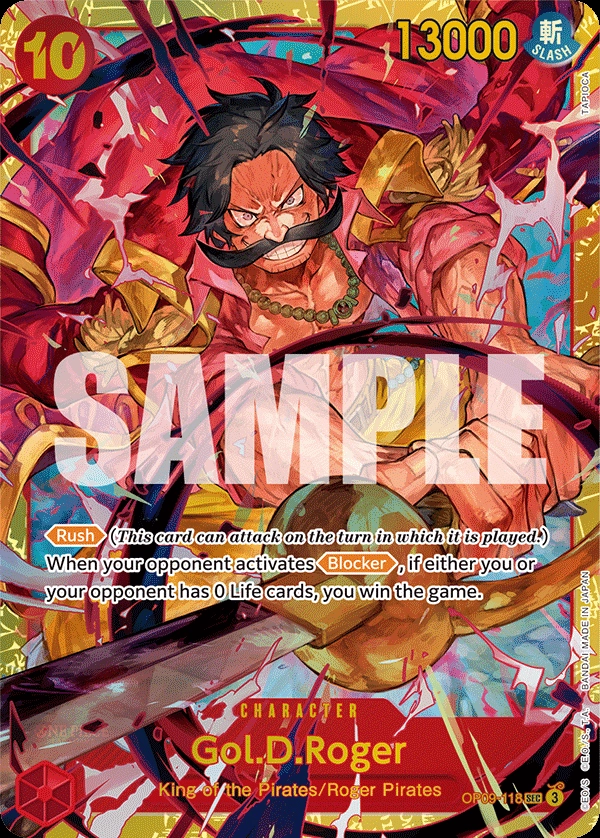
Gol D. Roger is a late-game finisher play. If either player is at 0 Life cards, the opponent can’t activate Blocker anymore or they’ll automatically lose the game. If the opponent is down to 0 Life cards, Gol D. Roger can go for a direct attack on the opponent’s Leader and force them to have enough Counter cards to stop the attack or lose the game.
Counter Event
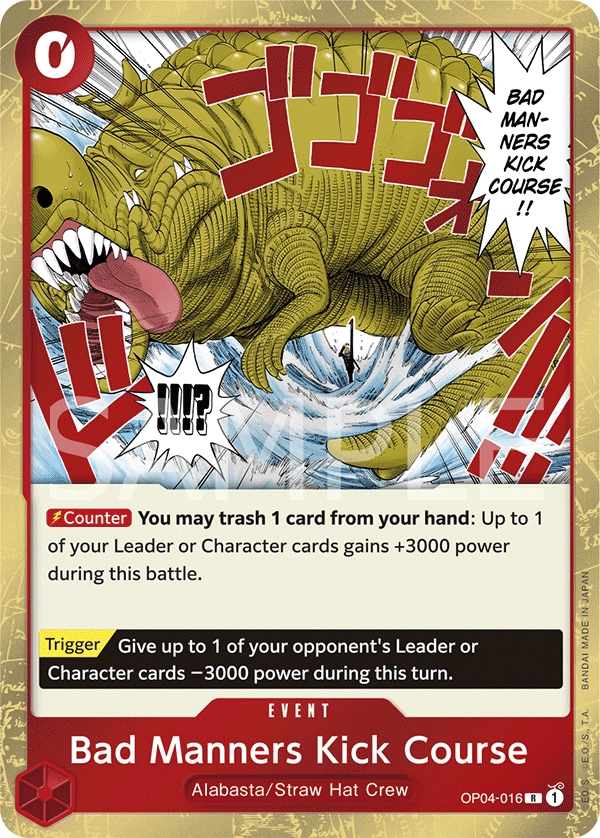
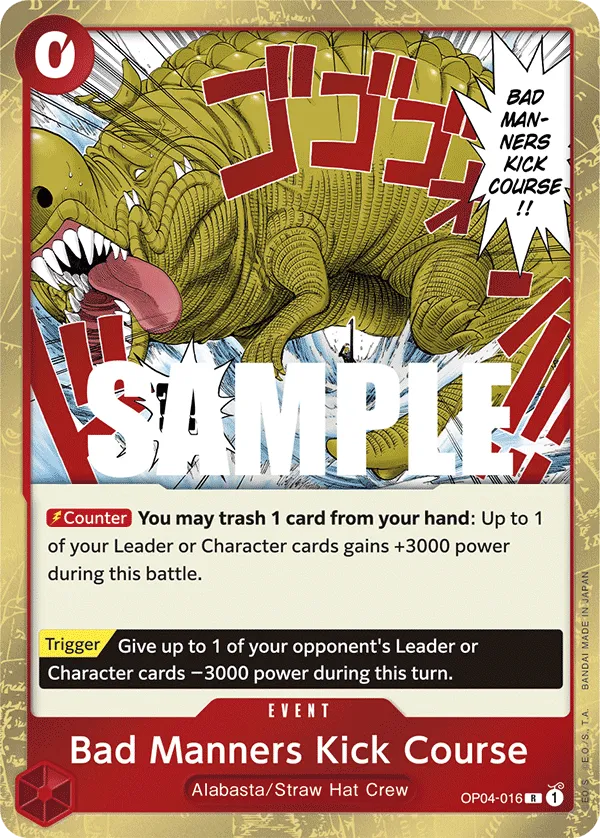
Bad Manners Kick Course to trash a card you need the least and gain +3,000 Power on your Leader or one of your Characters, great to shut down an attack.
Other Cards to Include

- Radical Beam!! is a 1-cost Counter Event to shut down one of the opponent’s attacks. You need to anticipate when you’re going to play it and save 1 Don for the defensive turn. Having 2 Life cards or less bumps Radical Beam‘s Power gain from +2,000 to +4,000.
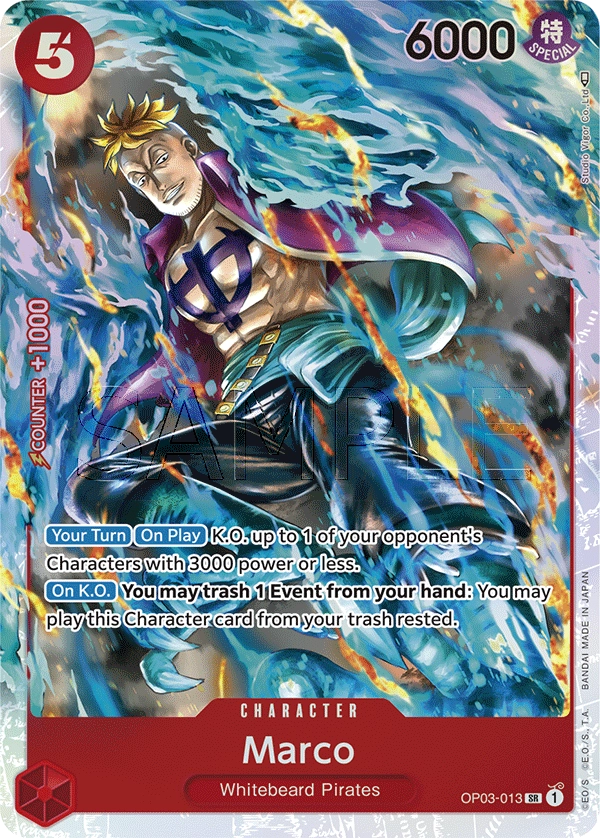
- 5-cost Marco can KO a 3,000 Power or less Character and up to 6,000 Power Character when combined with Building Snake.
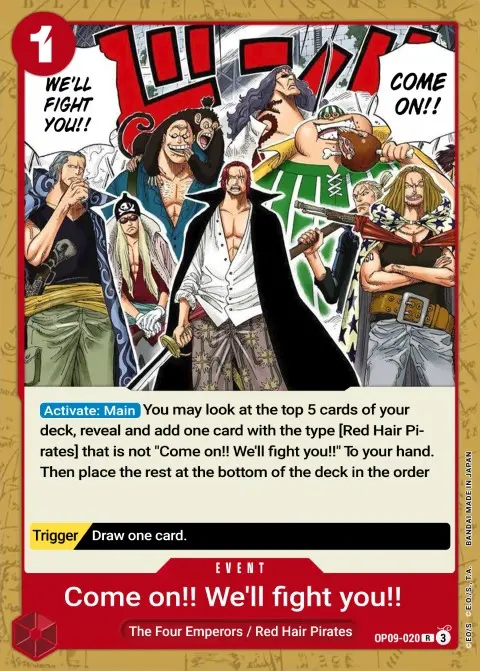
- Come on!! We’ll Fight You!! is a search card to find a {Red Hair Pirates} type card.
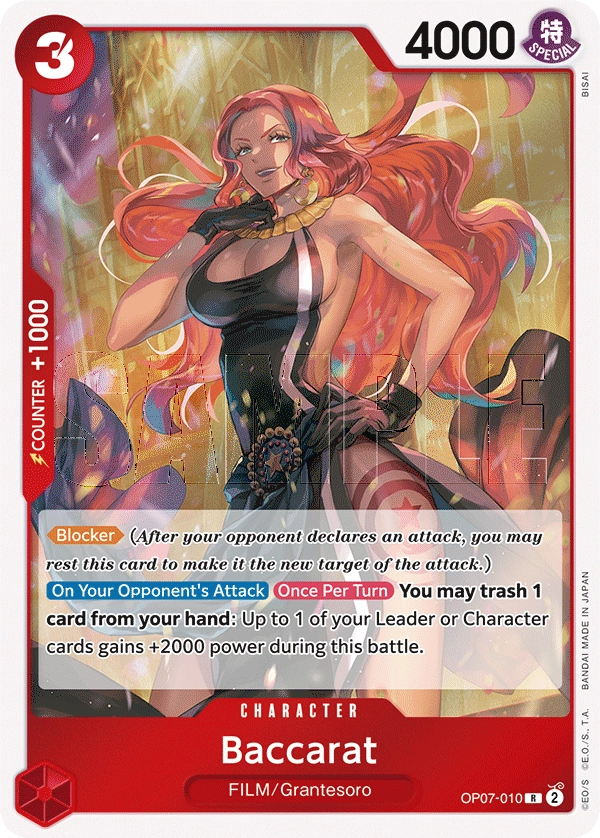
- Since this deck has many cards without a Counter effect, we use Baccarat to make them useful. Often, these 0 Counter effect high-cost cards stay in hand without being played, but Baccarat’s ability allows you to trash one of them to give +2,000 Power to your Leader or a Character.
- 10-cost Shanks enters the field and immediately KOs a 10,000-Power or lower Character, then remains a massive threat with his 12,000 Power. Most opposing Characters will fall within range of Shanks’ KO effect, making him a key late-game removal.
Turn-Based Gameplay
Going First
- Turn 1 (1 Don): Uta
- Turn 2 (3 Don):
- Turn 3 (5 Don): 5-cost Silvers Rayleigh or Yasopp.
- Turn 4 (7 Don): Edward Newgate or Benn Beckman.
- Turn 5 (9 Don): 8-cost Silvers Rayleigh or Monkey D. Dragon (You can use Power reduction Characters to help KO high Power Characters).
- Turn 6 (10 Don): Shanks.
Going Second
- Turn 1 (2 Don): Uta.
- Turn 2 (4 Don): Lucky Roux.
- Turn 3 (6 Don): 5-cost Silvers Rayleigh or Yasopp.
- Turn 4 (8 Don): 8-cost Silvers Rayleigh, Edward Newgate, or Benn Beckman (You can use Power reduction Characters to help KO high Power Characters).
- Turn 5 (10 Don): Shanks.