
Heya everyone! The OP12 Legacy of the Master set is releasing soon in the West, bringing a fresh new meta with Green Roronoa Zoro and Red Silvers Rayleigh at the top of the list to become popular meta choices.
Today, we’re diving into the 6 new Leaders, how they work, and sharing some top-performing lists in the East meta.
Red Silvers Rayleigh


Silvers Rayleigh forces you to stick to cards with a cost of 4 or less, so you’ll have to build your deck with that in mind. His second effect relies on you having 2 Events in your hand to reveal them to your opponent. You can then boost the Power of one of your Characters with 4000 base power or less by 2000.
This allows us to turn low-cost Characters with low power into attackers, forcing the opponent to expend counter resources and try to remove them. Characters like Sanji and Luffy have low power, but can gain Power during your turn, so you can use your Leader effect on them to make them a bigger problem for the opposing player.
4-cost Luffy can cheat out a 3,000 Power or less Character, so you’re usually aiming to play Sanji or Boa Hancock through Luffy’s effect, developing two Characters in one turn to try and aggro down the opponent.
3-cost Roronoa Zoro and 4-cost Kid & Killer are your Rush attacker, ensuring you keep pressuring the opposing player and can line up the winning attack to close out the game. If you don’t have those Rush cards, you can include the OP12 Jinbe that gains the Rush keyword and can be Power boosted by your Leader’s effect. He’s less popular than Roronoa Zoro since he can’t be searched, but still, many players in the East have found success with Jinbe in their list.
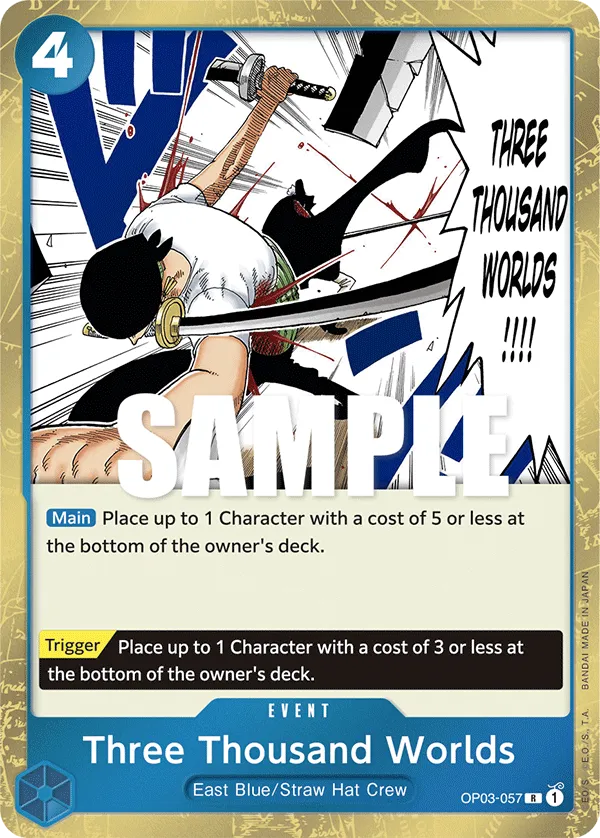
To Never Doubt–That Is Power! prevents blockers from blocking your Leader’s attack, perfect play if your opponent is down to 0 Life cards and want to close out the game.
Green Roronoa Zoro


Leader Zoro is a carry on his own, attaching 3 of your Don to your Leader activates his effect, enabling him to attack twice in one turn. There is a restriction to it, though, as the effect only activates when you’re attacking a Character. Then, Zoro cannot attack a character with a base cost of 7 or less during this turn. You’re basically controlling the board with Green Roronoa Zoro while still attacking the opponent’s Leader to threaten a Life card, putting your opponent in a tough situation where they have to decide whether their rested unit or their Life card is worth more to protect.
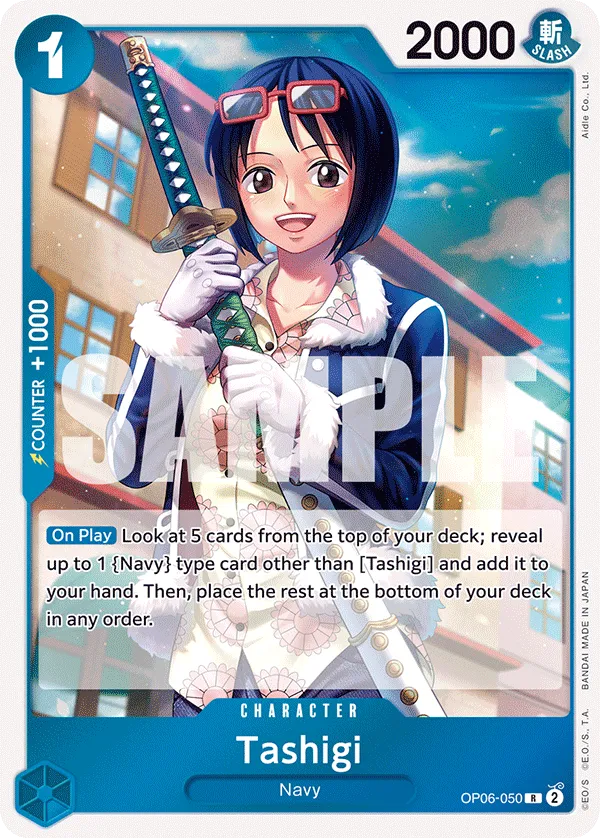
Kuina and Tashigi are perfect enablers for Leader Zoro, resting one of the opponent’s Characters and attaching 3 Don to your Leader, allowing Zoro to attack that Character and still go for another attack on the opponent’s Leader or an 8-cost or more Character.
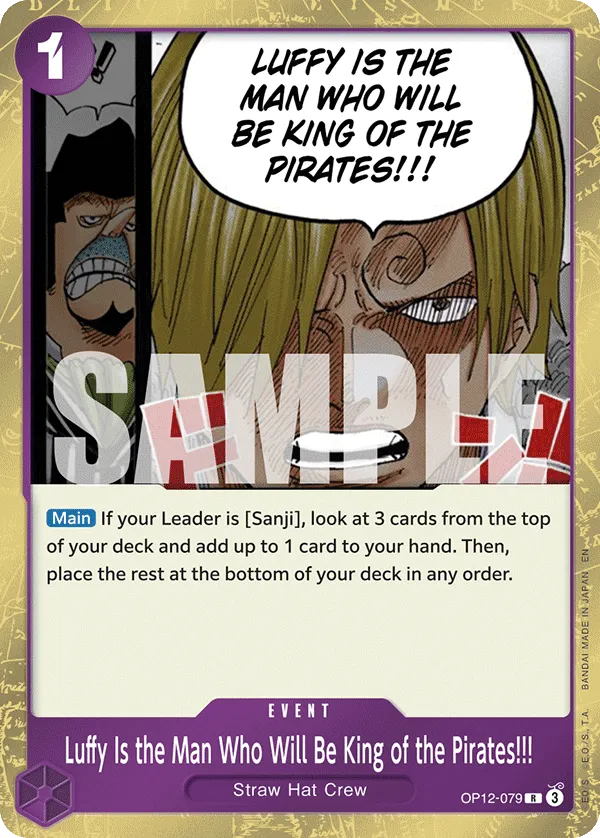
On top of that, we have Luffy Is the Man Who Will Become the King of Pirates!!! to re-stand our Leader to attack again. This can be a game finisher when your opponent is low on Life cards.
Dracule Mihawk is an 8,000 Power Blocker that sets 4 Don as Active, allowing you to develop another Character alongside him or continue playing aggressively with your Leader’s attacks.
Black Yellow Koala
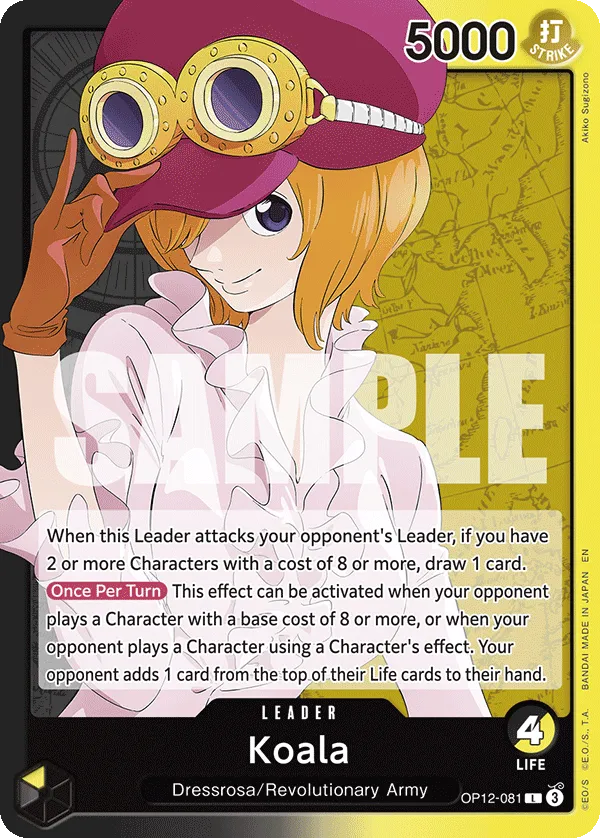


Black Yellow Koala loves 8-cost or more Characters, both yours and your opponent’s. She’s a value Leader that draws you a card when she attacks the opponent’s Leader, but you have to have two or more 8-cost or more Characters in play.
In hindsight, this effect might seem too difficult to activate, however, the list has cards like Bartholomew Kuma, Nico Robin, Hack, and Karasu that can increase their cost to 8 or higher through their effects, making it easier for you to activate your Leader’s draw effect and gain more resources.
I mentioned that Koala loves the opponent’s 8-cost or more Characters. This is because her second effect activates when your opponent plays one on the field, forcing them to take a Life card and add it to their hand. This puts their Leader at fewer Life cards, making it easier for you to plan your winning turn.
Bartholomew Kuma is an insanely good card, giving your Leader a Life card on the turn he’s played and another Life card when he’s KO’d, making sure your opponent doesn’t get to win the game quickly.
If activating Koala’s draw effect wasn’t easy enough, we have Monkey.D.Dragon cheating out one of our 6-cost or less {Revolutionary Army} type Characters from the trash. So we can play Nico Robin or Bartholomew Kuma along with Dragon, developing two Characters in one turn, allowing us to draw through our Leader, and gaining the defensive effects from Nico Robin and Bartholomew Kuma.
Purple Yellow Donquixote Rosinante

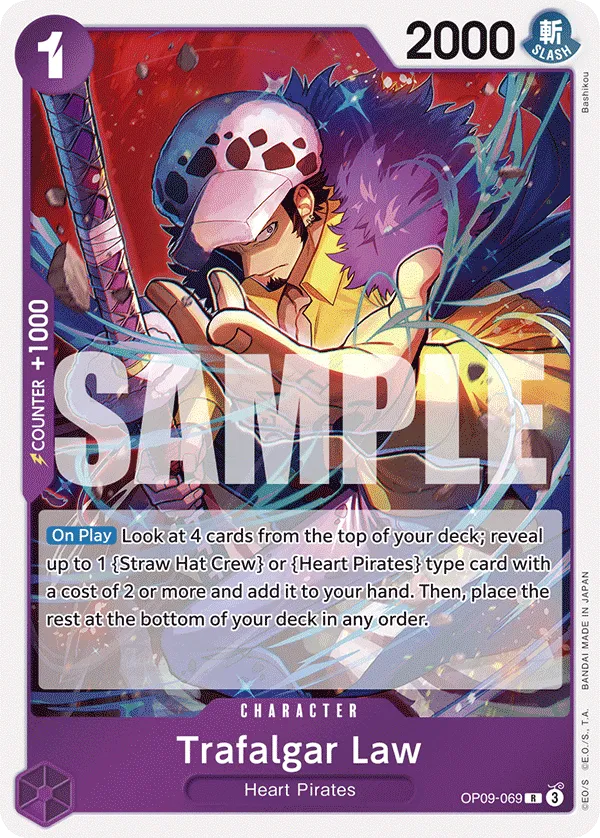


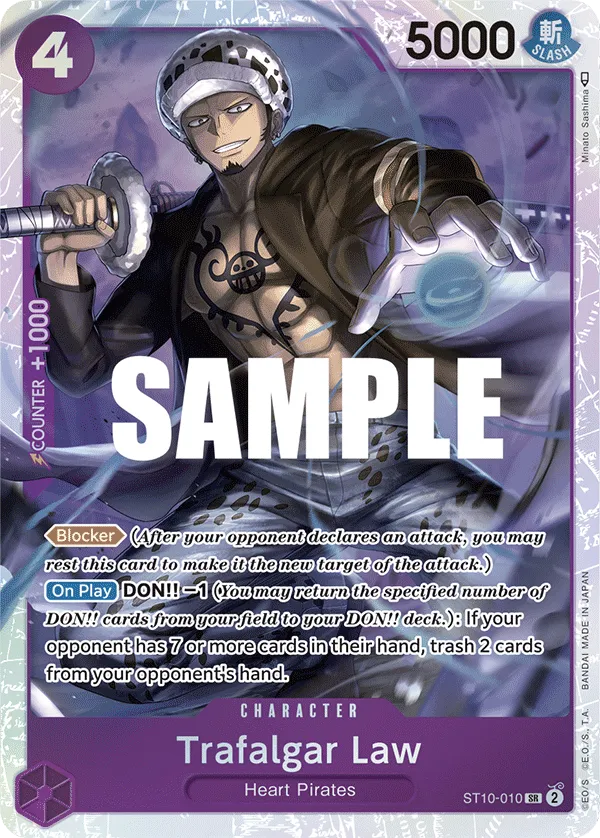


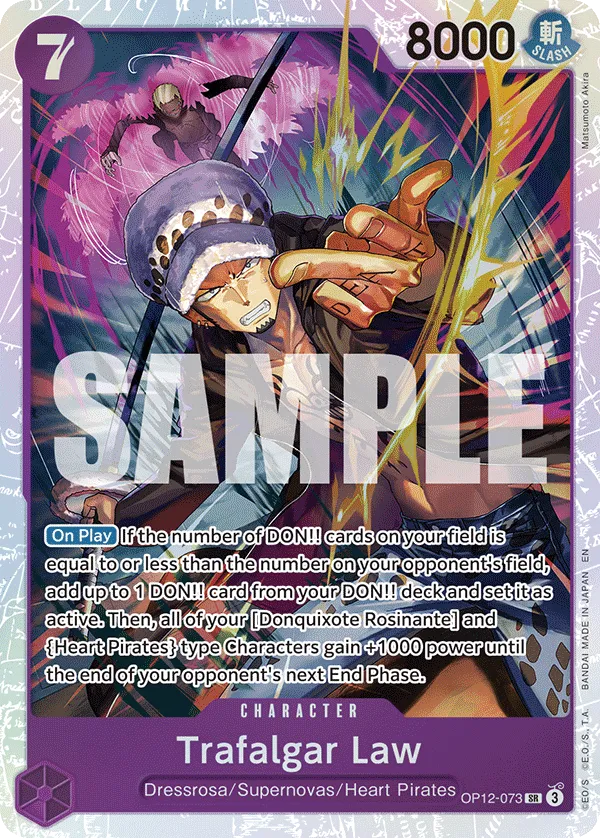
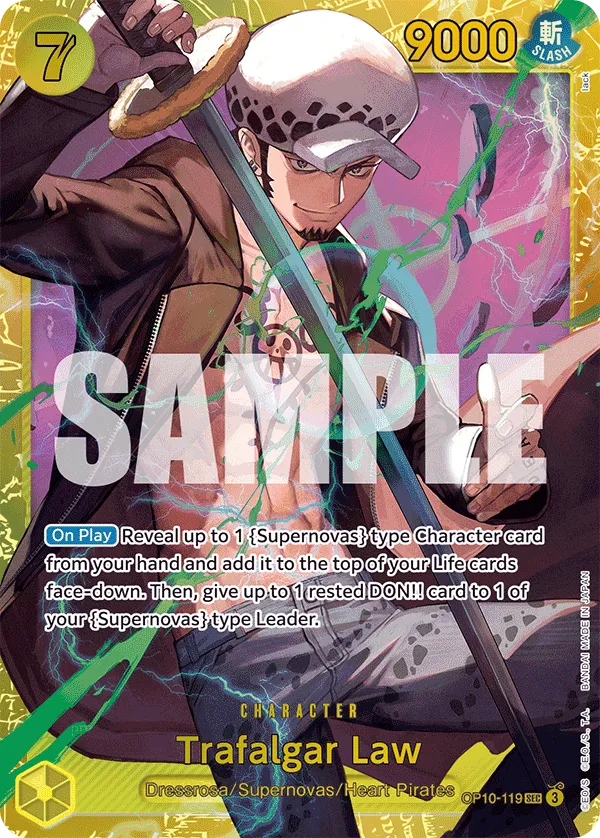

Leader Donquixote Rosinante synergizes with Trafalgar Law Characters, preventing them from getting KO’d by taking a Life card and adding it to your hand. You can only activate this effect once, but getting to keep your Law in play makes it harder for the opposing player to win the field presence.
Rosinante’s synergy with Trafalgar Law doesn’t end there. You can return 1 Don to your Don deck to reduce the cost of the next 4-cost or more Trafalgar Law you play by 2. This lets you play higher-cost Trafalgar Law on earlier turns and even plan for a two-character development in one turn.
Obviously, we’re going to include multiple Trafalgar Laws in this list to get the most out of our Leader’s effect. We have the 4-cost Blocker Law to force your opponent to trash cards from their hand, dropping them lower on resources. The 6-cost Law is another Blocker, with 7,000 Power, he can protect us from attacks while remaining in play.
As for the 7-cost Laws, the Purple Law ramps 1 Active Don if the number of DON!! cards on your field is equal to or less than the number on your opponent’s field. This will come in handy since our Leader effect de-ramps to play Laws at lower cost, making sure we don’t fall behind in the game in terms of Don cards. Purple Law will also boost the Power of [Donquixote Rosinante] and {Heart Pirates} type Characters until the end of the opponent’s next turn.
The Yellow 7-cost Law gives us a Life card, adding a protection layer to our Leader and forcing the opponent to go for an additional attack if they wish to win the game.
Blue Kuzan


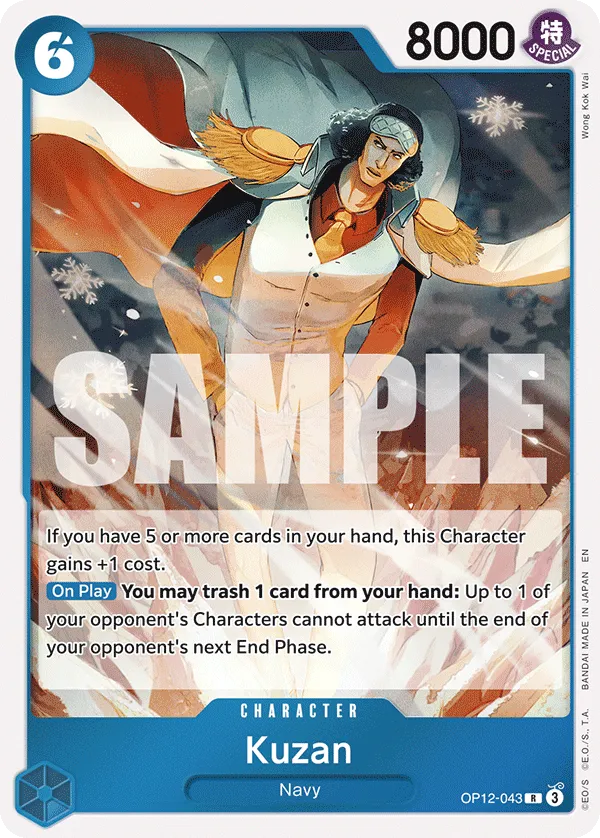


Blue Kuzan’s effect activates when one of your Navy cards trashes cards from your hand, letting you draw an equal number of cards to those trashed. This can filter your hand for better cards, but also enables you to activate powerful Navy effects without losing resources.
6-cost Kuzan trashes a card from your hand to prevent one of the opponent’s Characters from attacking on the upcoming turn, slowing down your opponent’s pace and making it harder for them to keep up with your plays. As for the 7-cost Sakazuki, he’s a value Character, drawing you two cards on the turn he’s played. He can also trash a card from your hand to attach a rested Don to your Leader or one of your Characters.
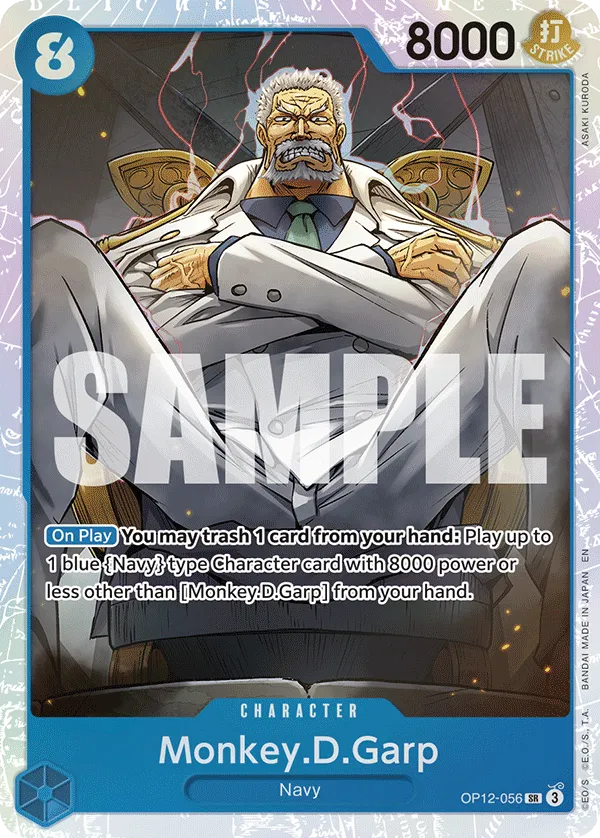
We have 2 late-game win conditions in this list: Monkey D. Garp and Aramaki. Garp trashes a card from your hand to cheat out a Navy-type character with 8,000 Power or less from your hand. So you get to develop Characters like Aramaki or Sakazuki alongside Garp, going wider on the field to overwhelm the opposing player.
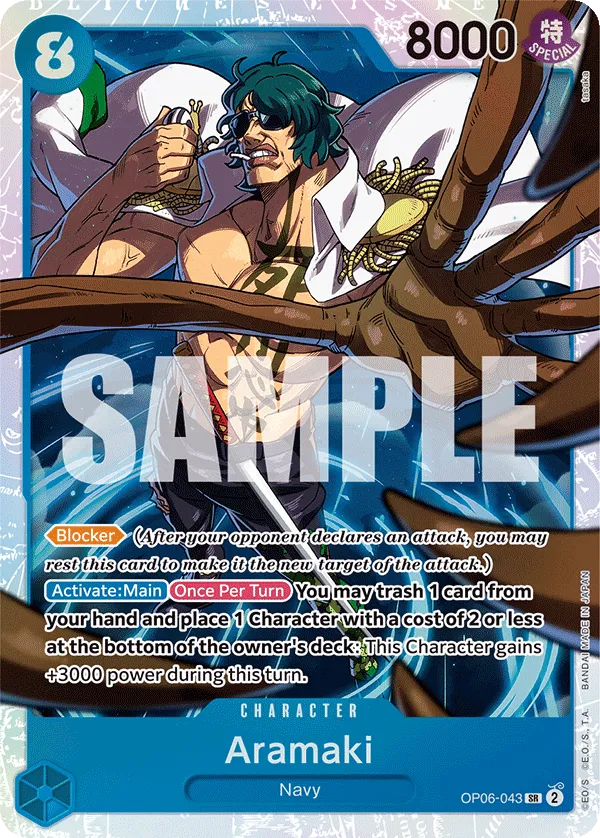
Aramaki is a Blocker that can become a high-power attacker, gaining +3,000 Power when you activate his effect. You also get to place a 2-cost or less Character at the bottom of the owner’s deck, which can be useful if there’s a blocker preventing you from connecting with their Leader.
Blue Purple Sanji

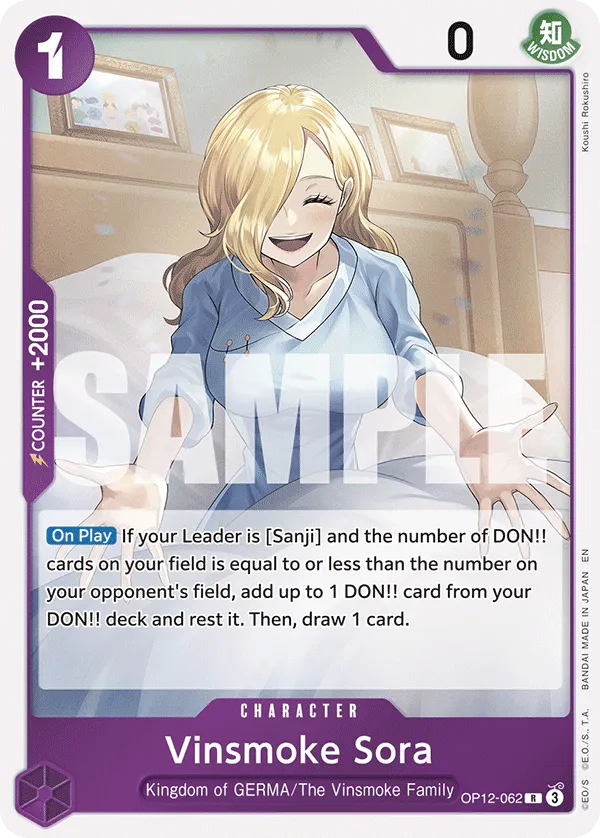


Blue Purple Sanji returns 1 Don to your Don deck to play a 3-cost or less Straw Hat Crew Event for free. This allows you to play your Events without sacrificing your field development; however, returning Don early into the game can punish us on the upcoming turns. Luckily, Leader Sanji has a built-in ramp effect, which activates when he goes for the attack and gives you 1 rested Don if the number of DON!! cards on your field is equal to or less than the number on your opponent’s field.
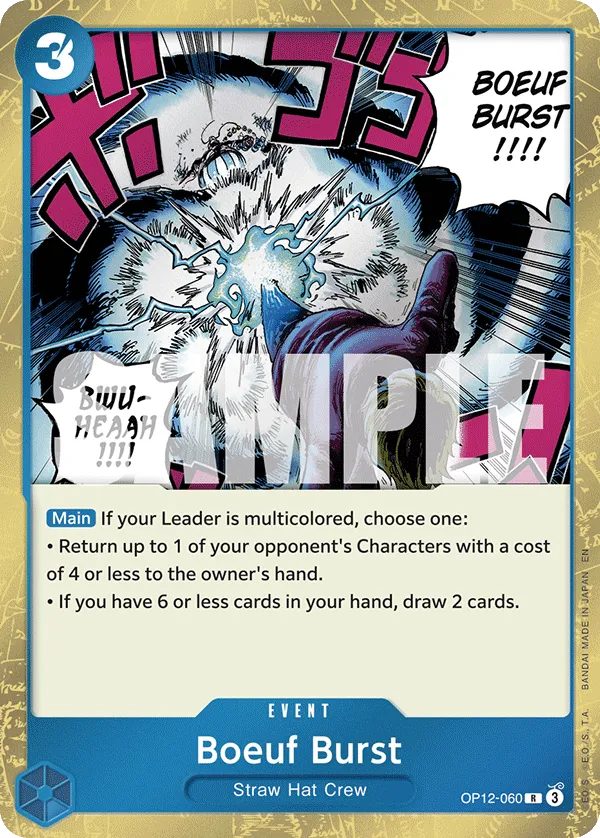
The ramp effect is perfect since it allows us to play our Events for free without worrying about falling behind in Don. Boeuf Burst is our strongest Event, letting us choose between returning an opponent’s 4-cost or less Character to their hand or drawing 2 cards if we have 6 cards or less in hand.
Since we run a lot of low-cost Events, we can easily meet the 3-cost Sanji and 4-cost Reiju’s conditions. 3-cost Sanji will gain a +1,000 Power boost for every 5 Events in your trash, eventually becoming a heavy hitter to put pressure on the opponent. As for Reiju, she’ll gain a +2,000 Power boost when you have 4 Events in your trash. Combined with her Blocker keyword, she can protect you from an attack and help you prolong the game until you can set the finishing blow.
We heavily rely on Sanji and Reiju as the win condition since the list doesn’t run any other attackers. You can include the likes of Jozu as a control Character that can go for high-power attacks.
Closing Words
The OP12 Leaders are all exciting to play, each bringing unique effects that set them apart and make them worth testing! Whether you’re looking for aggressive pressure, defensive power, or midrange versatility, there’s a Leader for everyone. We’ve seen how Green Roronoa Zoro and Red Silvers Rayleigh became top meta choices in the East, so they’ll likely be the popular picks in the West.
This is it from me! If you want to keep up with my content, consider following me on Twitter or BlueSky.


