
Blue Black Sakazuki’s ban has been lifted, which means he’ll be making a comeback in OP12 and OP13 metas! Whether he managed to perform in competitive tournaments will heavily depend on the state of the meta and the Sakazuki playerbase adapting his list after the bans of Gecko Moria, Ice Age, and Great Erruption.
Nonetheless, Blue and Black colors have a lot of strong card options that fit Sakazuki‘s playstyle, so there are different ways to build this Leader and test around with. Today, we’re taking a standard Blue Black Sakazuki list, and I’ll explain how this deck operates, the combos you’re trying to go for, and what to watch out for. I’ll also include other cards you can add to the deck to change it up a bit, depending on your playstyle, the meta, and the decks you’re trying to target. Let’s get started!
Leader
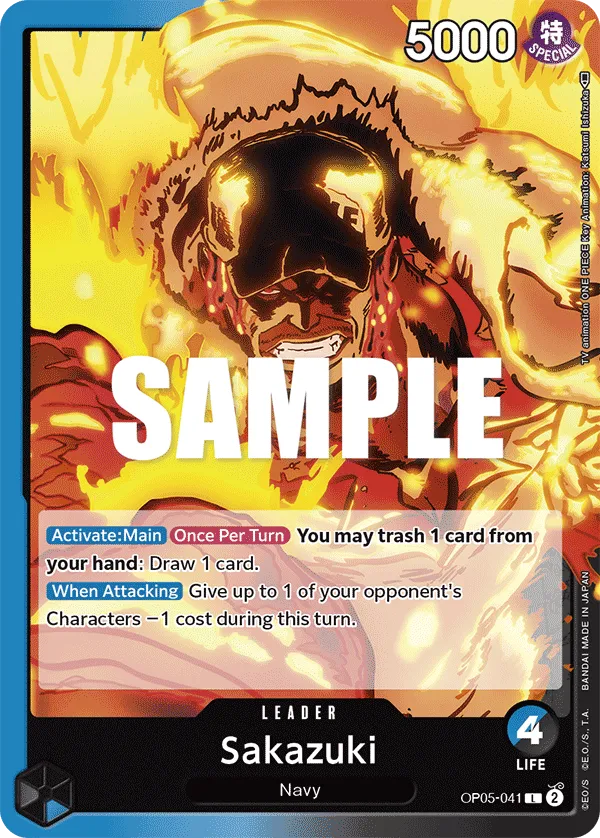
Blue Black Sakazuki is a 4 Life card Leader with two effects to use during your turn. Your first effect allows you to choose a card in your hand to discard and then draw a card in its place. This allows you to filter your hand for better cards, while also discarding cards to your trash. The Blue Black Sakazuki has multiple cards like Rebecca or Tempest kick that gain value from your trash, so your Leader effect will enable those cards and add more consistency to the deck. You’ll trash the card you need the least from your hand or prefer to have in your trash in the hopes of drawing better cards for the matchup.
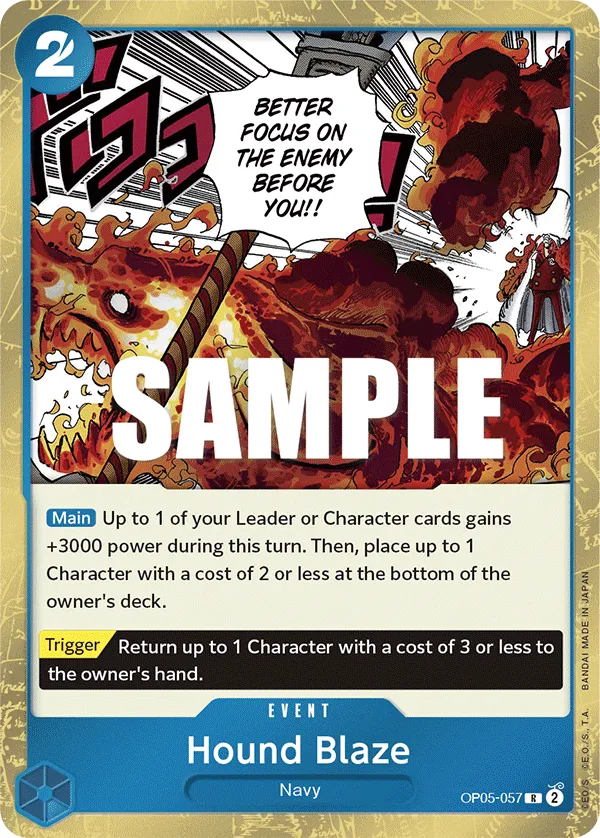
As for Sakazuki‘s second effect, when going for the attack, your Leader can reduce the cost of one of the opponent’s Characters by 1. The cost reduction will help you put a Character in range for removal plays like Hound Blaze, making it easier to control the board without requiring more cost reduction cards to assist you.
Blue Black Sakazuki Decklist


How to Play
The Blue Black Sakazuki is a control deck aiming to remove Characters in play and weaken the opponent’s upcoming turn. Your main goal is to make sure your opponent doesn’t win the field presence, keeping your Leader safe from multiple attacks, and as the game stretches out, you’ll start planning your finishing attack turn. Cost reduction plays a critical role in this deck to put your opponent’s Character low enough for your removal cards to deal with.
Early Searchers
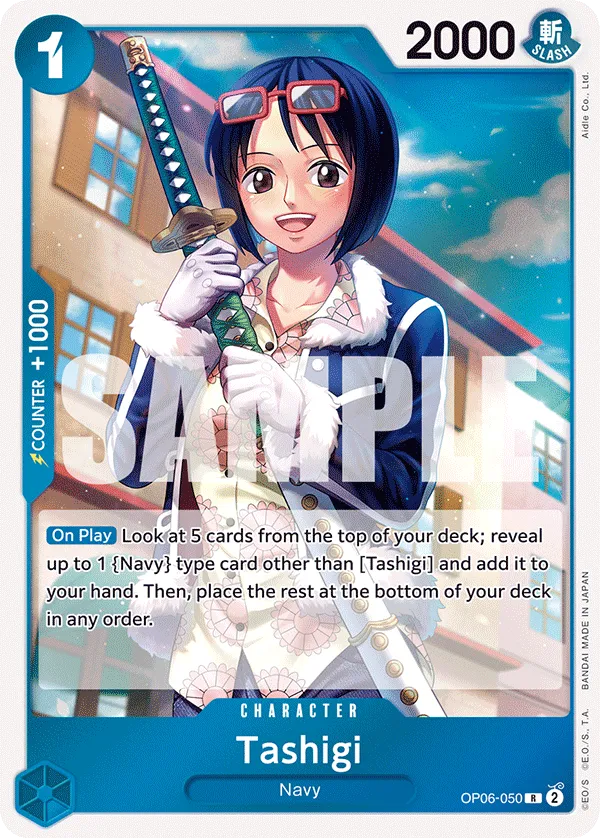
Tashigi and Brannew are searchers, looking at the top cards of your deck and allowing you to choose one Navy-type card to add to your deck. Brannew lets you look at the top 3 cards only, unlike Tashigi, which looks at the top 5; however, Brannew will trash the other 2 cards, adding more cards to your trash, which can come in handy later in the game.
Cost Reduction
Kuzan is our best early play, especially on turn 2 if we’re going second. For 4 Don, we’re developing a 5,000 Power Character that draws us a card and can reduce the cost of an opponent’s Character by 4 when he goes for the attack. This usually forces the opposing player to remove him immediately, or they’ll have one of their Character become an easy target for our removal card.
As for Hina, she’s a 3-cost 5,000 Power Character, which will mainly be played for her cost reduction effect. When played, Hina reduces the cost of one of the opponent’s Characters by 4, making it a much easier target to remove through cards like Brook, Hound Blaze, or Ama no Murakumo Sword.
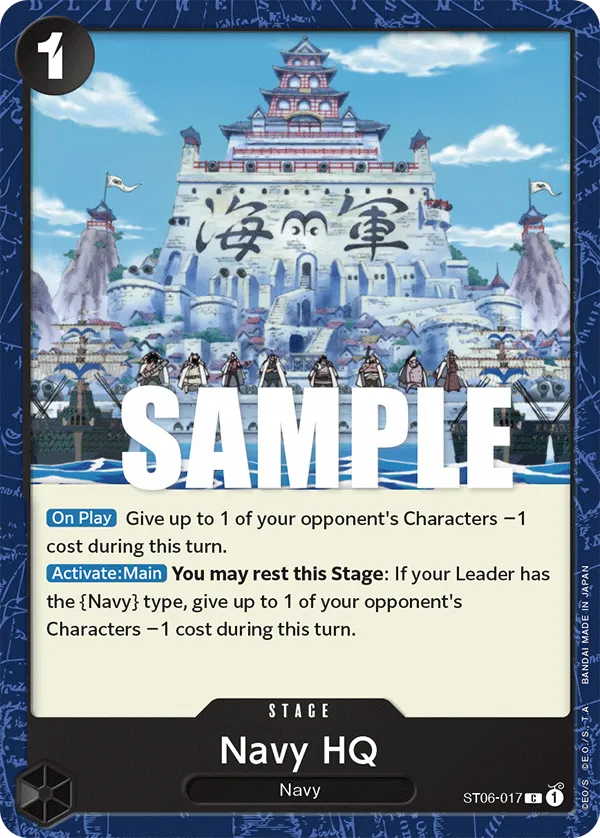
Navy HQ stage gives a -1 cost reduction on the turn it’s played, and then you get to activate its main effect to give a -1 cost reduction once every turn. So on the turn it’s played, it’s giving -1 cost reduction twice, and you’ll continue getting value from it throughout the game for the -1 cost reduction.
As for Tempest Kick, it’s one of your strongest cost reduction plays, giving one of your opponent’s Characters -3 cost reduction and drawing you a card. However, you have to have 10 cards in your trash to activate Tempest Kick‘s cost reduction, which shouldn’t be a tough condition to meet thanks to your Leader’s effect.
Technically, you need to be at 9 cards in Trash for the cost reduction effect to activate, since playing Tempest Kick will put it in the Trash, making the total cards in there 10.
Tsuru and Tashigi are +2,000 Counter cards with the ability to reduce the cost of an opponent’s Character by 2. You’ll have to rest Tashigi to activate her effect, but your opponent is forced to remove her, or you’ll get to reactivate the cost reduction effect on future turns.
Control Characters
Brook, when played or attacking, can reduce the cost of an opponent’s character by -1 and KO a 0-cost character. Your opponents will scramble to remove him immediately since Brook can reactivate both effects when he attacks. Alone, he isn’t much of a threat, but combined with your cost-reduction cards, you can start removing higher-cost Characters.
Jozu isn’t a Navy-type Character, so you can’t search for him, but he has a strong removal option, allowing you to return one of your Characters to return an opponent’s 6-cost Character to their hand. You can return one of your low-cost Characters, like 1-cost Tashigi or 2-cost Brannew, to remove a threat on the field, putting the opposing player behind in the game. Using your Leader effect first, you can even remove a 7-cost Character with Juzu without using any card resources.
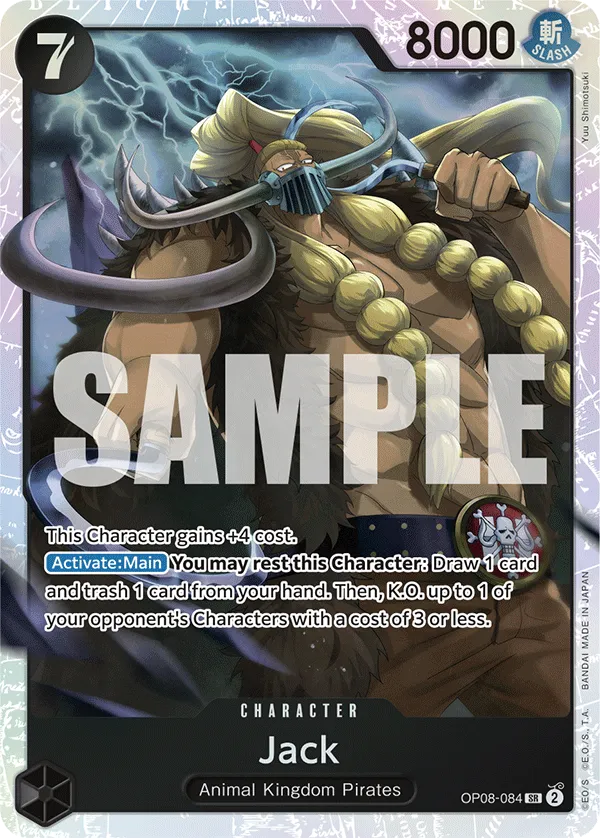
Jack is a 7-cost Character that can KO a 3-cost or less Character every turn through his main effect. Additionally, Jack draws one card and trashes one card from hand, so it digs through your deck for the key cards. So using only your Leader effect, you’re guaranteed to KO a 4-cost Character when you play Jack on Don 7, and if you have Navy HQ, you can KO a 6-cost Character.
Having to rest Jack to activate his effect means you won’t be able to use him offensively if you activate it later in the game. It also allows the opponent to attack Jack when he rests himself on the turn he’s played, but an 8K Power Character isn’t easy to remove.
Another effect Jack has is that in play, he becomes an 11-cost Character, which will only matter depending on the matchup you’re up against. So against Black decks, they’ll struggle to lower Jack‘s Power and KO him.
As for 10-cost Kuzan, he acts as both a cost reducer and a control Character, capable of giving a 5-cost AOE to all of the opponent’s Characters in play for as long as he’s in play, and his On Play effect KO’s a 0-cost Character. So, when you play Kuzan, you get to KO a 5-cost Character, and with your Leader effect, you’re KOing a 6-cost Character.
The -5 cost reduction will make things easier on the upcoming turn, letting you play your removal cards without being as reliant on cost-reduction cards. If you have cards like 4-cost Kuzan or 2-cost Uta in play from previous turns, you can KO a higher-cost Character when you play 10-cost Kuzan. Jack will also benefit from Kuzan‘s cost reduction, enabling him to remove an 8-cost Character.
Control Events
Hound Blaze is one of your strongest removal plays, placing one of the opponent’s 2-cost or less Characters at the bottom of the opponent’s deck, and giving your Leader or a Character a +3,000 Power boost. This means we get to bypass any KO immunity Character since we’re placing the card at the bottom of the deck, and we’re gaining a Power boost to go for a heavy attack.
As for Ama no Murakumo Sword, it’s best played to remove two of the opponent’s Characters, placing a 2-cost and a 1-cost Character at the bottom of the opponent’s deck.
You want to combine those control events with your cost reduction cards to make sure you can remove bigger threats and slow down your opponent’s pace.
Value Cards
Rebecca is one of our strongest plays, offering the blocker keyword to protect us from one of the opponent’s attacks and lets us put one black Character with a cost of 3 to 7 from our trash to our hand. She then lets us cheat a 3-cost or less black Character from our hand, so we’re usually going for either Brook or Hina. We’ll choose Brook if we need the KO effect and Hina for the cost-reduction effect.
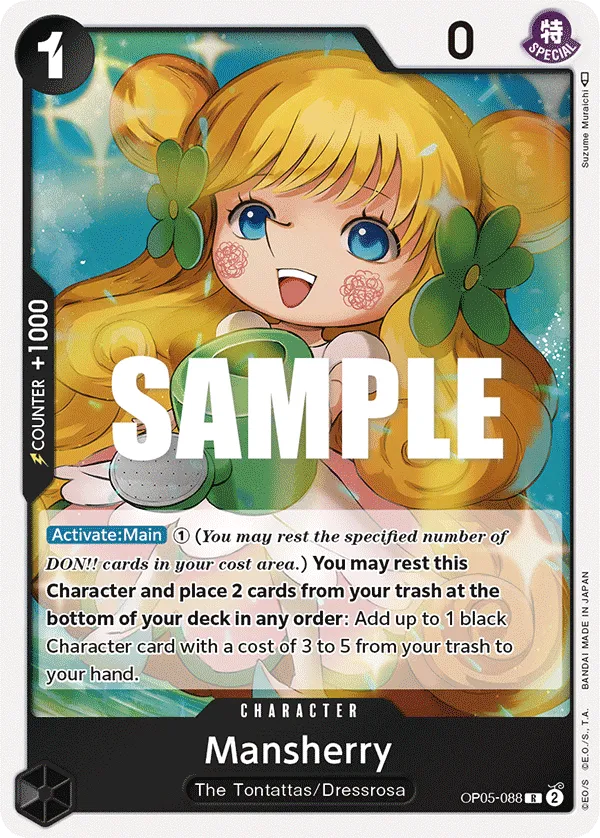
Mansherry is a value Character. You can rest her and a Don to add a 3 to 5 cost Black Character from your trash to your hand. Ideally, you want to grab Rebecca from the Trash, giving access to an additional Character development. Other options like Brook or 3-cost Tashigi can also find use depending on the game.
You do have to return 2 cards from your trash to the bottom of the deck to activate Mansherry‘s value effect, so you’ll often use her in the late-game.
Your opponent is forced to KO Mansherry to shut down the value generation. If possible, you can protect her by sacrificing your Rebecca and then grabbing that Rebecca again from the trash to replay her for her On Play effect.
Deciding on whether it’s worth protecting Mansherry comes down to the state of the game and what your opponent is capable of doing.
General Tips
- We want to use our Leader first before making any plays. When filtering our hand for better cards, we could find a better play than our current hand, so it’s recommended to go for your Leader effect. However, you are not forced to always activate your Leader effect. In the later stages of the game, you might be content with your current hand and you’d rather not risk drawing into a worse card.
- Keep control of the board. We have a low-life card leader, so we can easily get aggroed down if our opponent develops multiple Characters. The list is full of control options and cost reduction tools to choose from, making sure you weaken the opponent’s upcoming turn.
- Keep track of your trash. Cards like Rebecca require certain cards in your trash to get the most out of her. Using our Leader effect, we can make sure those cards are in the trash for Rebecca to pull and play.
Mulligan Tips
Going First: 1-cost Tashigi, Navy HQ. 4-cost Kuzan, 7-cost Jack.
Going Second: 2-cost Brannew, 4-cost Kuzan, 6-cost Jozu.
Other Cards to Include
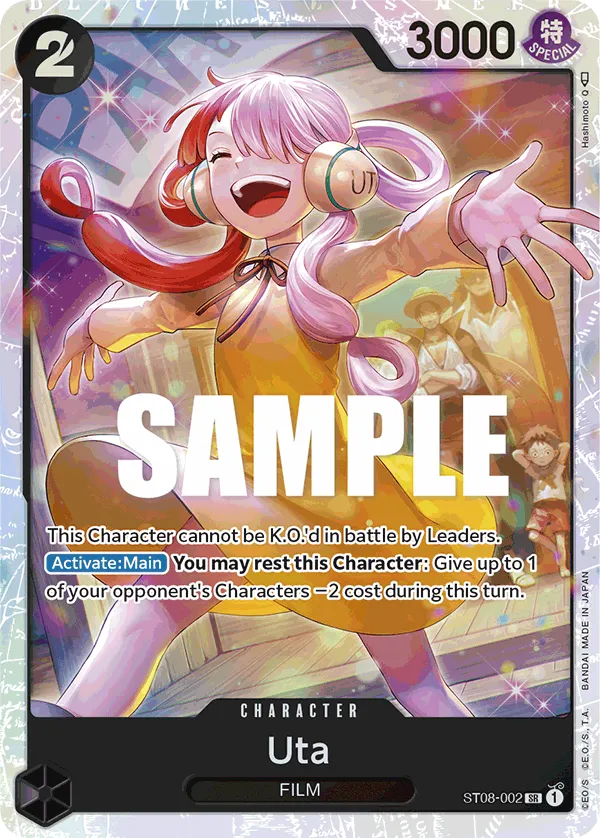


- We can have Uta early into the game to KO a Character in the early turns. You have to rest her to give one of the opponent’s Characters a -2 cost reduction. Combined with your Leader effect, you can KO a 4-cost Character with Brook to slow your opponent down. When rested, Uta is vulnerable to opponents’ attacks, but they can’t KO her with their Leader’s attack and will need to have a Character in play to try and remove her.
- 4-cost Rob Lucci is capable of KOing two targets, one with a cost of 2 or less and the other with a cost of 1 or less, adding a powerful punch to your strategy. When activating Rob Lucci‘s effect, you have to place 3 cards from your trash at the bottom of the deck. Pick cards you don’t expect to need in your trash, such as Events, Jack, or 10c Kuzan.
- Black Vortex is a meta call to counter the popular Green Roronoa Zoro, shutting down his Leader effect to restand and attack a second time.
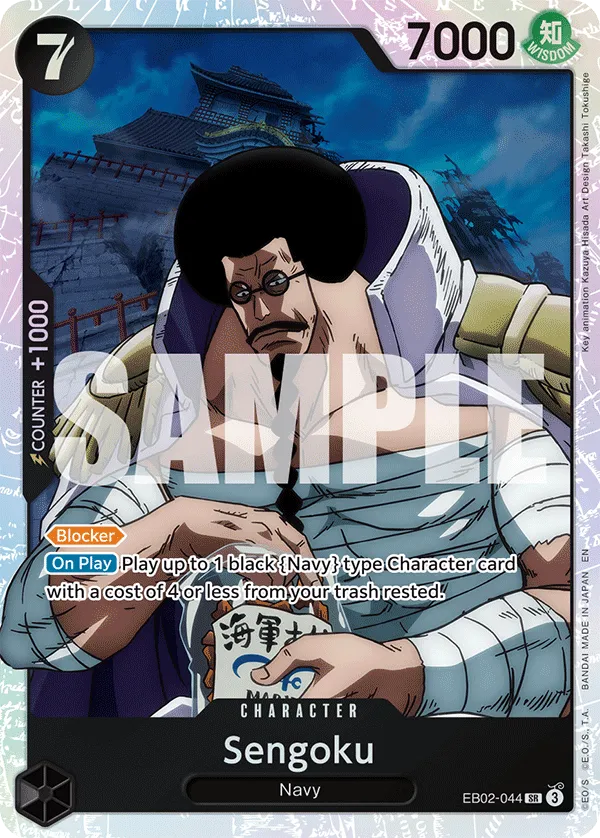


- 7-cost Sengoku is a 7,000 Power blocker that cheats out a 4-cost Black Navy type Character from your trash. This means we get to cheat out the likes of Kuzan or Hina.
- 7-cost Borsalino is an old inclusion in this deck that gets to place a 4-cost or less Character at the bottom of the opponent’s deck while remaining on the field as a heavy 8,000 Power attacker.
- Gravity Blade Raging Tiger remains one of the strongest control Events in blue decks, placing two 6-cost or less Characters at the bottom of the deck. With Leader Sakazuki‘s effect, you can place a 7-cost Character, making it an even bigger threat to the opponent’s development.
- 4-cost Shirahoshi is a blocker that can reduce the cost of an opponent’s Character by 4, enabling you to follow her up with a removal play.
Closing Words
Blue Black Sakazuki is still in its early stages after the ban, and lists will heavily depend on how the meta shifts. This deck used to be the strongest in the meta, especially since it was capable of adapting to different matchups thanks to the many synergistic combos in its card pool.
This is a difficult deck to master, as you’ll have a lot of decision-making that will play a role in whether you maintain your board control in the late-game or end up getting overwhelmed by the opposing player.


