
The One Piece Card Game’s competitive scene remains strong in the OP13 meta, but the introduction of new Leaders has shifted the landscape. Many players have raised concerns about power creep, pointing to several OP13 Leaders with overly powerful effects backed by strong support cards.
While OP12 and OP13 Leaders dominate most tournaments, a few underdog strategies are still managing to break through. In this guide, we’ll highlight the top-performing decks in OP13 so you know what to expect heading into competitive play.
Red Blue Portagas.D.Ace


The Red Blue Ace has been crushing the OP13 competitive scene and has quickly become the best deck to pick. If you’re going into a tournament, this is one of the decks to watch out for, as you’re going to see a lot of players going for it.
This Leader has a built-in ability to give one of the opponent’s Leaders or Characters a -2,000 Power reduction by trashing a card from your hand. This means we get to trash a dead card to boost our defensive capability, making it even harder for the opposing player to go through our 6.000 Power Leader. We also can’t forget about Leader Ace’s draw value effect, as we’re drawing a card when we take damage or a 6,000 Power or more Character is KO’d, ensuring we don’t lose resources in the late game.
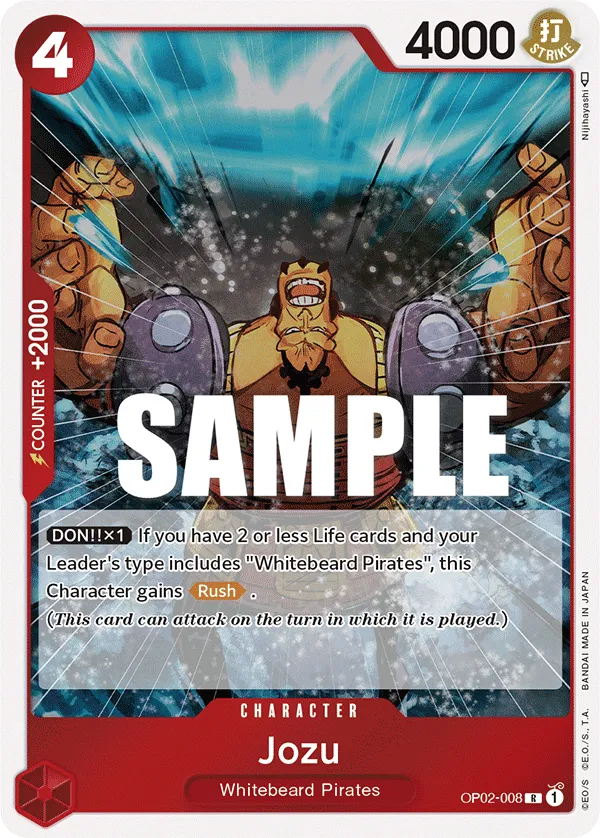
With Marco and Yamato, we have a strong early to mid-game, dropping bodies that our opposing player will have to remove. On top of that, Jozu is great for shifting the board presence in your favor, removing one of the opponent’s 6-cost or less Characters from the field to weaken their upcoming turn.
The win conditions are the 10-cost Newgates, but we can play them a turn earlier using I Am Whitebeard!! Event, putting a high Power Character with a strong defensive effect to buy you time while still acting as a heavy hitter.
Black Imu


The Black Imu deck is another top performer in OP13, keeping up with the Red Blue Ace. This deck’s core strategy is using the 10-cost Five Elders to cheat out 5 {Five Elders} type Character cards with 5000 power and different card names from your trash. You get to go wide on the field and plan multiple attacks to pressure the opposing players. Two of your Five Elders have the Blocker keyword, so they can buy you enough time until you’re confident you can finish the game.
If you want to use 10-cost Five Elders on the same turn, we need The Empty Throne in the list, which we can play for free at the start of the turn. Instead of paying 10 Don to play Five Elders, we can have it in play for 3 Don, leaving us with enough Don to activate it and make other plays.
For the mirror matchup, we need to have Mary Geoise in the list as your Black Imu opponent can play Never Existed… in the First Place… to remove your The Empty Throne.
Red Purple Gold D.Rogers


Red Purple Rogers has been gaining popularity over the past weeks, overtaking Red Silvers Rayleigh as players continued to tweak the list. Although the Leader has 7,000 Power, we’re getting a -2,000 Power reduction as long as we’re at 9 Don or less. This means we need to ramp up as fast as possible to get to 10 Don and turn our Rorgers into a 7,000 Power Leader, capable of going for heavier attacks and a tough target for opponents to break through.
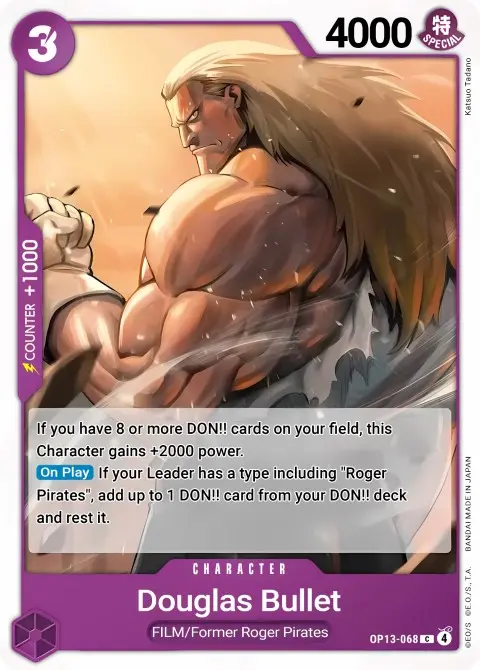
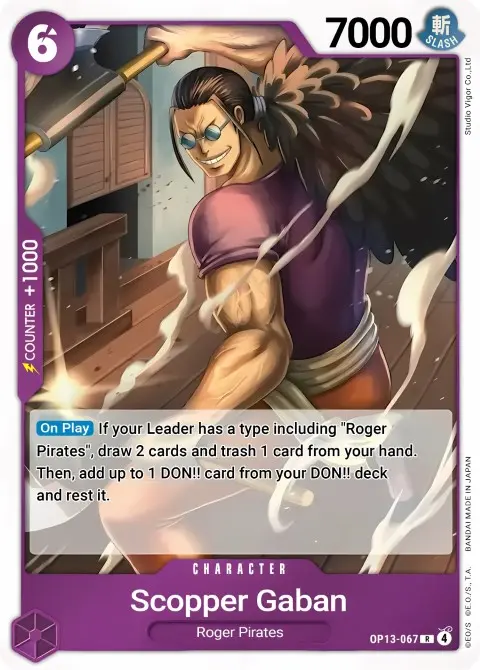
The list has Douglas Bullet, Bon Clay, and Scopper Gaban for the ramp, speeding up your strategy to hit 10 Don and allowing you to play your high-cost Character a turn earlier than expected.
8-cost Gol.D.Roger is one of the newest additions to the list, giving your Leader a +2,000 Power boost until the end of the opponent’s upcoming turn. He does require you or your opponent to have 10 total Don, but turning your Rogers into a 9,000 Power Leader can be devastating for the opposing player.
The 10-cost Shanks and Rogers are your Rush aggressors. Shanks is great to weaken the opponent’s Characters, whereas Rogers is crucial to setting up aggressive turns, especially when you’re trying to close out the game, but a blocker is in your path.
Green Roronoa Zoro


Green Zoro was terrorizing OP12 meta, but the OP13 Leaders have been keeping him in check. The list did change compared to the previous meta, as players removed the 8-cost Mihawk for 6-cost Law, preferring the early aggression that Law offered, letting you cheat out a 5-cost or less Character like Tashigi or Cavendish.
The 3-cost Mihawk is another way to ensure we can aggro the opposing player, letting us cheat out 4-cost Zoro on turn 2 if we’re going first (3 Don), setting up an attack to threaten the opponent’s Life cards.
With our Leader’s ability to attack a rested Character then re-stand for a second attack, we’re keeping the opposing player on edge, forcing them to choose whether they value their Character or Life card more. On top of that, Luffy Is the Man Who Will Become the King of Pirates!!! enables an additional Leader attack, perfect when we’re trying to drop the opponent low on Life cards or even line up the winning turn, forcing them to have the Counter resources to survive the attack.
Red Silvers Rayleigh


Red Silvers Rayleigh is an aggressive Leader, trying to set up multiple attacks with low-cost Characters and boosting their Power through Leader effect. The 4-cost Luffy is how we go wider on the field, letting us cheat out a Sanji to plan strong attacks and try to drop the opposing player low on Life cards as early as possible.
Zoro and Kid are our Rush attackers, great to keep the aggression going, and have win conditions capable of closing out the game. To Never Doubt–That Is Power! enables our Leader to ignore the opponent’s Blocker, perfect when the opposing player is low on Life cards, and you can start threatening a win condition through your Leader’s attack.
Using our 0-cost Events, we can protect our Leader in the late-game, preventing the opponent from setting the finisher attack and giving you an additional turn until you can win.
Red Green Luffy


Red Green Luffy has one of the strongest defensive abilities, letting you rest Don to gain a +2,000 Power boost on your Leader or a Straw Hat Crew type Character. However, you can only have up to 5 Active Don to activate your Leader’s effect. Understanding how much Don you need during your defensive turn can go a long way, as you won’t be weakening your offensive turn as much.
The list has cards like Cavendish, Sanji, and 6-cost Luffy that set your Don as Active, making it easier for you to bank Don for defensive turns and protect yourself from attacks. This makes you less reliant on your Counter cards and holding onto them for later in the game. The 6-cost Luffy is a major threat with his Double Attack, threatening to take 2 of the opponent’s Life cards.
9-cost Roronoa Zoro is how this deck wins games. We want to have him in play as early as possible and plan for the triple attack turn, putting the opposing player at the threat of losing the game, especially if they’re down to 2 or less Life cards.
Blue Black Sabo


Red Black Sabo is a 5,000 Power Leader, but he starts with a drawback: as long as you have 4 or more Life cards, his Power is reduced by 1,000. This means your early attacks are weaker, and opponents can more easily take your first two Life cards.
The downside shifts once you play a Character that costs 8 or more and attach a Don to Sabo. From then on, Sabo and all your Characters gain +1,000 Power during both players’ turns, as long as that 8-cost Character stays on the field. This not only boosts your offense but also makes it harder for opponents to push damage through or clear your board.
Since Sabo is a Dressrosa/Revolutionary Army Leader, he has plenty of support to activate this effect quickly. Hack and 6-cost Sabo are key enablers that help you reach an 8-cost Character early.
Among those 8-cost options, the Black Dragon version helps you go wider on the field, setting up a strong attack turn. The Red Dragon version, on the other hand, is best when you need immediate pressure thanks to its Rush ability.
Some lists have been including St. Marcus Mars as a Blocker and a control tool, letting you KO a 5-cost or less Character. We can also play him through the Black Dragon, so we’re developing a Blocker while also KOing one of the opponent’s attackers.
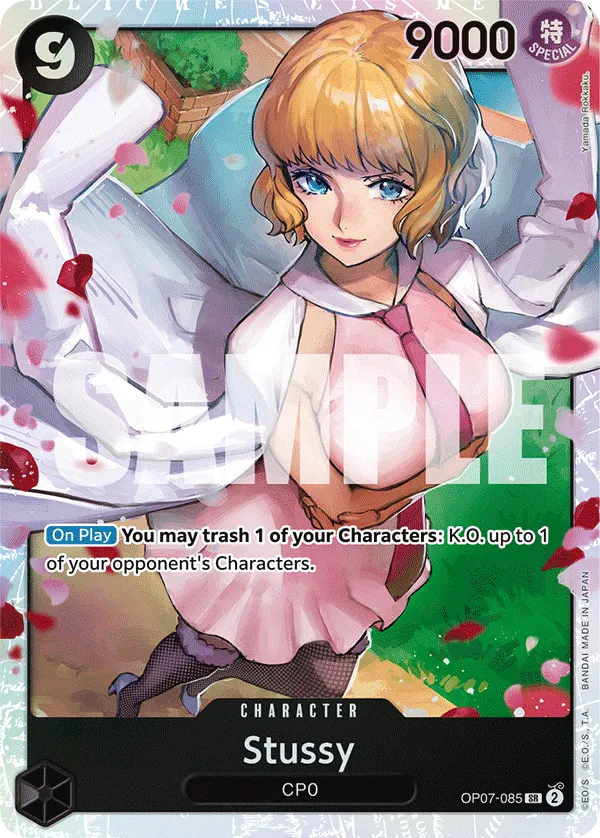
Stussy is an answer for high-cost win conditions, more specifically, cards like 9-cost Zoro or 10-cost Shanks.
Blue Purple Luffy


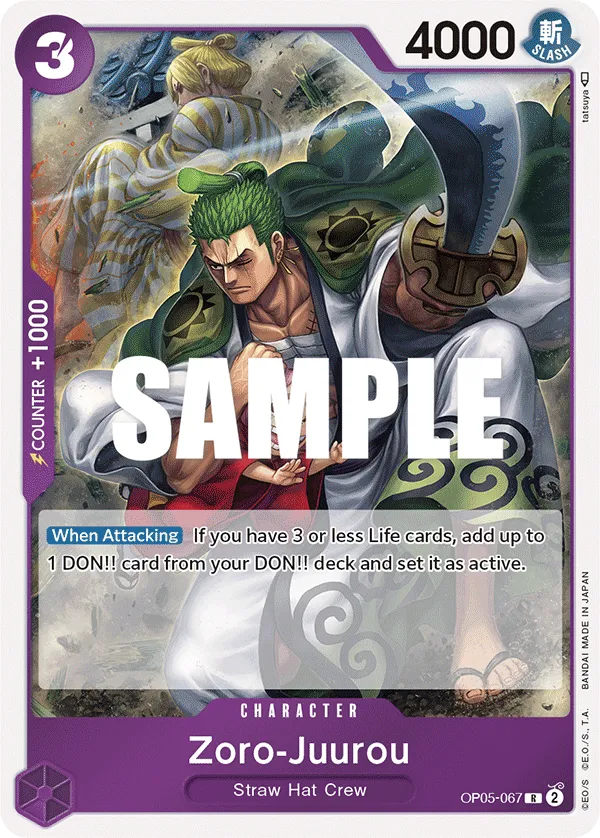


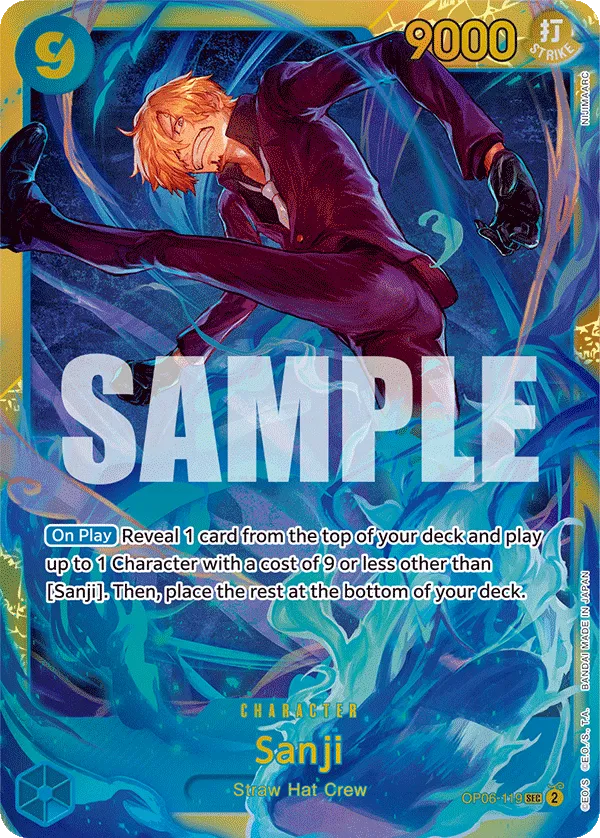


Blue Purple Luffy runs Gear 2, Zoro-Juurou, and Bon Clay as ramp cards, trying to get to its Leader effect as early as possible. When you start your turn with 8 Don, you can look at the top 5 cards of your deck to add 1 Straw Hat Type card to your hand and order the rest however you want. This comes in handy when you’re going for the 9-cost Sanji, as you’re guaranteeing the top card in your deck is worth cheating out through Sanji.
Sanji can cheat out the likes of Gol.D.Roger and Monkey.D.Luffy, developing two big bodies in one turn to overwhelm the opposing player and put them behind in the game. The longer the game stretches out, the more likely we are to win the game. This is why we rely on events like Gear Two, Gum Gum Giant, and Thunder Bagua to protect our Leader and push for an additional turn or two until our heavy hitters can finish the job.


