
Red Shanks is regaining its popularity in the Western OP12 meta, becoming one of the most-played decks on the SIM and showing up in multiple top cuts. This deck focuses on controlling the field, preventing opponents from keeping too many Characters in play, as it takes things to the late game. Leader Shanks’ effect stalls out the game, saving you from playing too many Counter cards. This enables you to run high-cost win conditions at a lesser risk.
Different builds are floating around in the comeptitive scene, so today, we’ll take one of the standard control lists to talk about and I’ll share other cards you include whether you want to shift for a more tanky build with Shanks or a Rush build with Monkey.D.Luffy and Monkey.D.Dragon.
Leader

Shanks is a defensive Leader, capable of reducing the Power of one of your opponent’s attackers by 1,000 when they go for the attack. This prevents 5,000-Power attackers from damaging your Leader and reduces the need to use Counter resources when defending against higher-power attacks.
With your Leader’s effect, it will be easier to protect your Leader and Characters, allowing you to push the game longer and have your high-cost win conditions carry the game.
Red Shanks Decklist


How to Play
The Red Shanks deck focuses on controlling the field by KOing opponents’ Characters and weakening their overall offense. Simultaneously, it develops powerful Characters like 8-cost Silvers Rayleigh and 10-cost Shanks, which can be challenging for opponents to handle. Multiple attacks from these heavy hitters can eventually win you the game.
Rather than going all-out aggressive with the Red deck, this strategy relies on the Leader’s effect to slow down the opponent’s tempo, aiming for a late-game takeover by high-cost Characters. The deck’s multiple KO-effect Characters help shift board control in your favor.
Early Turns
Uta is an early-game searcher used to find a {Red Haired Pirates} card to play on the upcoming turns. You can find the cards you’ll need depending on the state of the game and your deck, drawing late-game win conditions or Counter cards to protect you on your defensive turns.
Blockers

Lucky Roux is a 5,000 Power blocker who, when KO’d, activates his effect to KO a Character with a base power of 6,000. Since Lucky Roux is a blocker, you can control when he’s KO’d, using his ability to block an attack and KO one of your opponent’s Characters at the best moment. This protects our Leader from an attack and removes a Character from play, aiding us in controlling the field and slowing the opponent’s pace.
4-cost Shanks is a great defensive card. He’s a 6,000 Power blocker that lets you trash 1 card during the opponent’s attack turn to reduce the Power of the opponent’s Leader or a Character by 2,000. This means we get to trash dead cards in our hand for basically a +2,000 Counter, adding to our defensive strategy and making it harder for the opposing player to get their attacks through.
4-cost Tony Tony Chopper is a +2,000 Counter card, but we can play him on the field for his Blocker keyword. During your opponent’s turn, Chopper becomes a 6,000 Power Character, meaning we can block an attack and keep him in play to keep using him defensively on future turns.
Yasopp offers protection for Leader Shanks differently, providing a +1,000 Power that stays active during the opponent’s attack turn, making it easier to Counter attacks. Additionally, Yasopp weakens an opponent’s Character by -1,000 Power whenever he attacks, making him a persistent nuisance if left on the field. The Power reduction from Yasopp‘s not only makes it easier to KO a rested Character, but it can drop the power of an opponent’s Character in range for one of your removal plays.
Control Characters
7-cost Benn Beckman is a 7,000 Power Character that trashes an opponent’s Character rather than KO, making him a strong counter to KO-immunity Characters like Jesus Burgess. He can trash a Character with 6,000 Power or less, so he usually is a great play in the mid-game, but he will have a tough time against high-power targets, relying on your Power reducers.
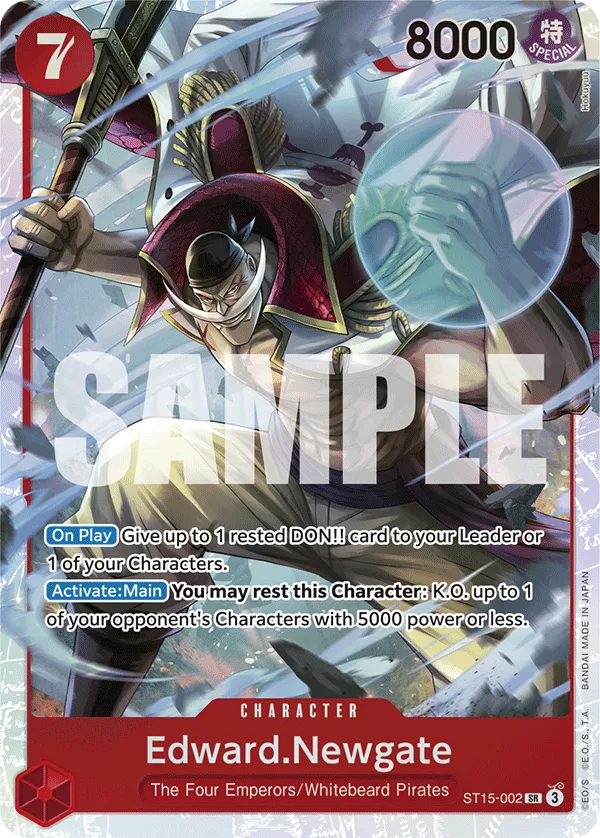
Edward Newgate is an 8,000 Power Character that can KO a 5,000 Power Character. Additionally, Newgate grants a rested Don to your Leader or one of your Characters, which can synergize with Yasopp to KO a 6,000-Power Character. You can reactivate Newgate‘s KO effect once per turn, keeping the control option available when needed. However, going for the KO effect on later turns means you’re giving up your 8,000 Power attack with Newgate.
Silvers Rayleigh is one of the top control Characters, reducing the Power of two of your opponent’s Characters by -3,000 and -2,000. This puts one Character in range of Rayleigh’s KO effect, while the other becomes vulnerable to your attackers if it’s rested. The Power reduction lasts until the end of your opponent’s next turn, so even if the second Character isn’t KO’d, it won’t be as threatening offensively.
You might find yourself in situations where you play Silvers Rayleigh for the power reduction only, even if you can’t KO a meaningful Character. Since the power reduction sticks till the end of the opponent’s turn, it will make it harder for them to get their attacks through with those Characters. So we’re using Silvers Rayleigh defensively to protect our Leader and stretch the game longer.
10-cost Shanks can KO a 10,000 Power or less, perfect for removing a win condition and shifting the field presence in your favor. Shanks is a 12,000 Power Character, so he’s a tough target to remove and can go for heavy attacks, too difficult for the opposing player to counter out of.
Power Reduction
Building Snake is your strongest power reducer, giving one of your opponent’s Characters a -3,000 power reduction. This allows Characters like Benn Beckman and Silvers Rayleigh to remove up to 9,000 Power Characters.
Otama is a +2,000 Counter that can be used for her -2,000 Power reduction effect, making it easier to attack and KO a rested Character or bring it within range of your KO effects.
Hongo can be played on turn 2 and left on the field until his -2,000 Power effect is needed. To activate his effect, you have to rest Hongo so he will become vulnerable to opponents’ attacks. If you have a blocker, you could potentially protect him to keep reusing his cost-reduction later in the game. However, in most cases, you’ll Hongo for his +2,000 Counter.
Shanks Rush
On Don 10, we want to slam 10-cost Shanks on the field, especially when the opponent has multiple Characters on the field. His -1,000 Power reduction to all enemy Characters weakens their offense and helps save Counter resources. It also makes it easier to KO Characters, either through attacks or KO effects.
Additionally, Shanks has Rush, allowing you to immediately use his 12,000 Power to KO a rested Character or go straight for the opponent’s Leader.
We won’t allow the opposing player to KO Shanks through attacks, forcing them to use a removal effect to deal with him.
Event
Gum-Gum Fire-Fist Pistol Red Hawk is a Counter event that gives your Leader or one of your Characters a +4,000 Power boost. Gum-Gum Fire-Fist Pistol Red Hawk can then KO a 4,000 Power or less Character, which can be useful to remove a low-power blocker. However, using your Leader’s power reduction effect, you can KO a 5,000 Power Character.
Other cards like 4-cost Shanks and 8-cost Silvers Rayleigh can also reduce a Character’s Power and let Gum-Gum Fire-Fist Pistol Red Hawk KO them.
As for the Trigger effect, Gum-Gum Fire-Fist Pistol Red Hawk gives one of the opponent’s Leaders or Characters a -10,000 Power reduction, rendering it offensively useless.
Other Cards to Include
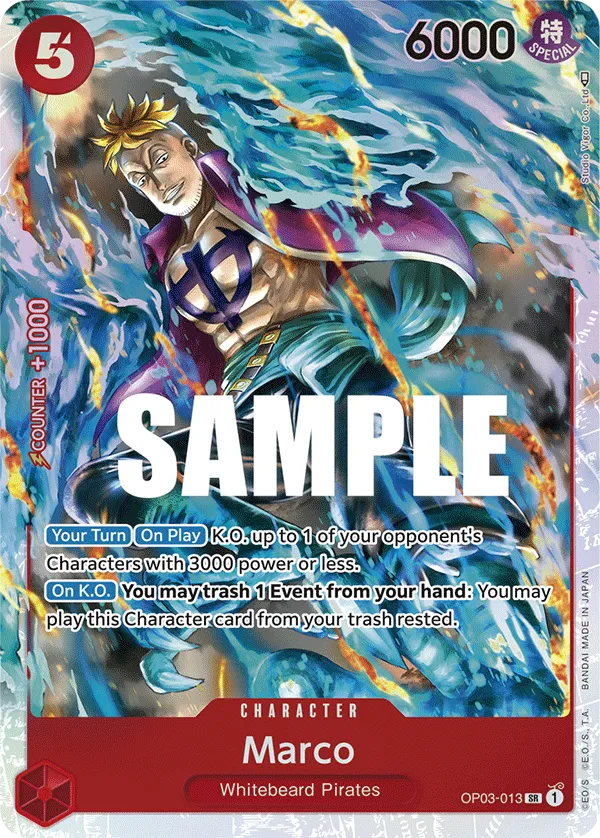


- 5-cost Marco can KO a 3,000 Power or less Character and up to 6,000 Power Character when combined with Building Snake.
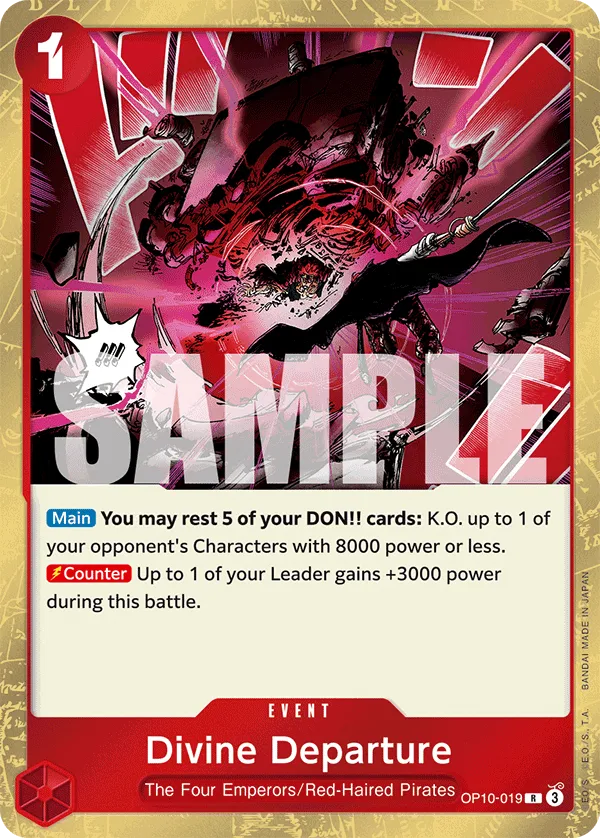
- Divine Departure is a versatile Event that can be used during your turn to control the field or during your opponent’s turn as a Counter effect to protect your Leader or a Character. Its main effect lets you rest 5 Don to KO 1 of the opponent’s Characters with 8,000 Power or less, an extremely powerful removal option to KO a high-power Character. As for its counter effect, for 1 Don, you can give your Leader or a Character +3,000 Power.
- Bad Manners Kick is a 0-cost event that trashes a card from your hand to give your Leader or one of your Characters a +3,000 Power boost. You get to trash a dead card in your hand for the power boost.
- Red Force Stage lets you reduce the Power of one of the opponent’s Characters by 1,000, making it easier to attack and KO or put it n range for one of your removal cards.


- 6-cost Uta and 9-cost Shanks can be played for less Don if you meet their conditions. If you have a Character with 10,000 power or more in play, Uta becomes a 2-cost Character, easier to play alongside another Character to act as a blocker and protect you from one of the opponent’s attacks.
- As for the 9-cost Shanks, he requires your opponent to have a Character with a base power of 8,000 or more to reduce his cost by 3, becoming a 6-cost 10,000 Power Character. On Play, 9-cost Shanks gives your Leader a +2,000 Power boost that sticks until the end of your opponent’s upcoming turn. This gives your Leader the ability to go for a heavier attack while making it harder for the opposing player to get their attacks through. Developing a 10,000 Power for 6 Don allows you to make stronger plays, you’re creating a board of heavy hitters, too tough for most decks to remove, and will eventually get overwhelmed by the high-power attacks. In the late game, you can play 9-cost Shanks and follow it up with Uta, developing two Characters in one turn.


- 5-cost Luffy is a great aggressor, providing a 6,000 Power attack on the turn he’s played. When attacking, Luffy attaches 1 rested Don to your Leader or a Character, boosting the Power of another attack by +1,000. The longer Luffy stays in play, the more value you gain from the rested Don effect, so protect him when possible.
- Monkey D. Dragon is an 8-cost Rush attacker with 9,000 Power, so he’s already packing a punch when he joins the field. However, Monkey D. Dragon will also give two rested Don to your Leader or a Character, enabling an extremely aggressive turn to pressure the opposing player.
Important Matchups
Green Roronoa Zoro

- Green Roronoa Zoro can go for multiple attacks, trying to control our field while pressuring our Life cards. Red Shank’s Leader effect can be great to lower Zoro’s attack Power, making it easier to Counter from. Another good card for this matchup is the 4-cost Shanks, as we’re able to reduce their Leader’s Power for the turn, making their multiple-attack turn weaker.
- We’ll have a rough time controlling their side of the field if they have 2-cost Koushirou or 3-cost Tashigi. Ben.Beckman can still trash a Character 5-cost Character even with Koushirou in play, but them having 7,000 Power means we’ll need to rely on cards like Yasopp or Building Snake.
- If their first Leader attack is on your Leader, activating a blocker won’t be useful, as you’ll only trigger Zoro’s effect to go for a second attack. A Blocker will only be useful if you have multiple ones in play, or it’s Zoro’s last attack.
Green Jewelry Bonney

- Bonney’s rest effect can be frustrating to play against. Whenever they have an Active Don during your turn, they’ll usually rest your biggest threat. This means we should attack first before dropping a Character, as we don’t want them resting it and attacking into it on the upcoming turn. We should also attack with our strongest card first so they don’t rest it.
- Cavendish and Carrot are usually key cards we need to KO, both easy targets for Ben.Beckman to deal with. However, if they have a Tashigi in play, we’ll need to deal with her first.
- Their only way of removing our high-cost win conditions is through the 9-cost Shanks. However, they can also keep them from attacking on the upcoming turn through 10-cost Doflamingo. We’ll find ourselves playing the long game, controlling their side of the field until they run out of steam.
- Keep in mind that Hody Jones can join in to rest our blockers or Don, creating an extremely aggressive turn to rush us down.
Red Silvers Rayleigh

- This is an aggressive deck that tries to go wide with the help of 4-cost Luffy and start going for multiple attacks.
- All their Characters have low power and usually rely on their Leader’s effect to boost them offensively. This means when rested, we can easily attack and KO them and rely on removal cards to deal with their Active Characters.
- As long as we stay at 2 Life cards, we should generally be fine, especially since we have blockers to protect us.
- If we’re down to 0 Life cards, your opponent can use To Never Doubt–That Is Power! to ignore your blocker with their Leader attack and try to close out the game.
Blue Purple Luffy

- We’re trying to prolong the game and win the board presence against Blue Purple Luffy using our high-cost win conditions. The high-cost Shanks will be tough for the opposing player to remove unless they have a Gum Gum Red Ric, making it harder for them to keep their board presence.
- 10-cost OP06 Shanks is your strongest play in this matchup, allowing you to KO one of their win conditions, and having 12,000 Power means he’s almost impossible for the opponent to remove. We’ll focus down their board until we remove their threats before shifting to their Leader, through multiple high-power attacks, it will be tough for the opponent to protect their Life cards, and forcing 2 Gum Gum Giant in one turn will put them behind in the game.
Green Purple Luffy

- Sanji & Pudding is a core part of Green Purple Luffy’s strategy, so we’re aiming to KO it through Divine Departure or Power reduction + Ben.Beckmann. This should slow the opponent’s pace, preventing them from activating their Leader’s effect in the mid-game if they don’t have another Sanji & Pudding play.
- They don’t have answers to blockers, so they can protect our Leader’s Life cards in the later stages of the game, buying us enough time to win the board and start planning our upcoming turn
- GP Luffy can’t deal without high-cost win conditions and often will ignore them completely, focusing their attacks on our Leader and trying to rush us down.
Black Teach
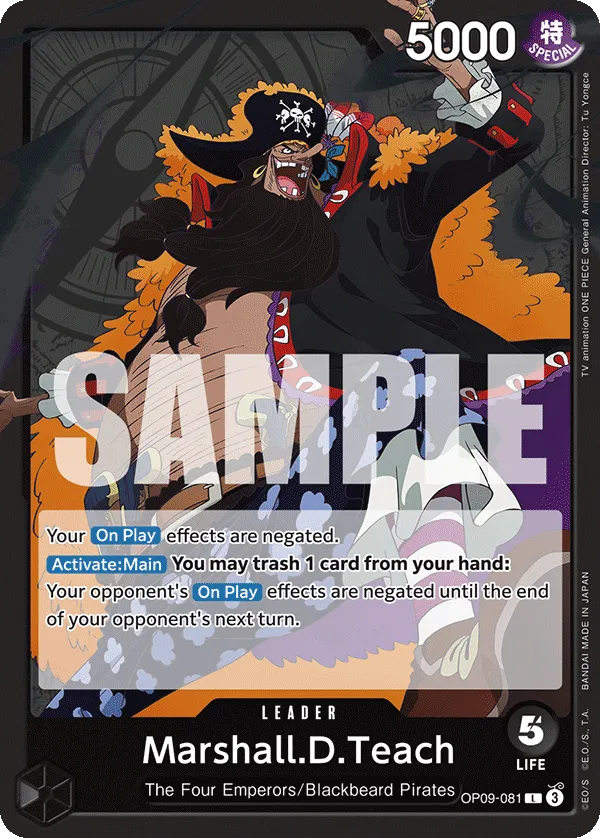
- Teach can shut off our On Play effects, so Benn.Beckman and Silvers Rayleigh won’t be able to KO opponent’s Characters. Rush attackers will play a more important role in this matchup since they can keep pressing the aggression on the opposing player. 10-cost Rush Shanks is the carry, and your opponent can’t remove him easily.
- Benn Beckmann can trash the opponent’s Jesus Burgess, but since your On Play effects will be shut down, your opponent will render him useless.
- We have to KO their cost-reduction Characters like Van Augur.
Red Roronoa Zoro

- Red Roronoa Zoro is an aggressive deck trying to develop multiple Characters and attack your Leader to rush you down. Lucky.Roux is an extremely strong Character for this matchup, blocking one of the opponent’s attacks and KOing a 6,000 Power or less Character, perfect for removing OP08 Tony Tony Chopper.
- They have multiple Rush attackers, but eventually will run out of steam. As long as we KO their field and protect our Life cards, they’ll have a rough time setting up the winning turn. At 0 Life cards, they can ignore your blocker with Sanji or Diable Jambe, so it’s best to stay at 1 Life card.
Closing Words
Red Shanks is making a comeback in the OP12 meta, having performed well in multiple Western tournaments so far, and will likely continue to see more play in the competitive scene. There are different versions of this deck among players, and I tried to present the popular cards that players are including in their lists and finding success with.


