
Blue Boa Hancock is an off-meta Leader who fell in popularity after Doflamingo‘s rise. However, she’s still a fun Leader to pick up and is receiving support cards, giving her a boost to her strategy. Boa Hancock relies more on returning Characters and gaining value over the opponent. The longer the game takes, the more likely you’ll outvalue the opposing player and eventually win the field.
The Blue Boa deck is still seen in locals, and sometimes it can manage to fight through the top meta decks and make it far. If you have the cards and want to take Boa Hancock on a test run, play against friends, or even give her a shot in tournament play, I’ll cover the list and the deck’s strategy here. I’ll also share different cards you can include in the list!
Leader

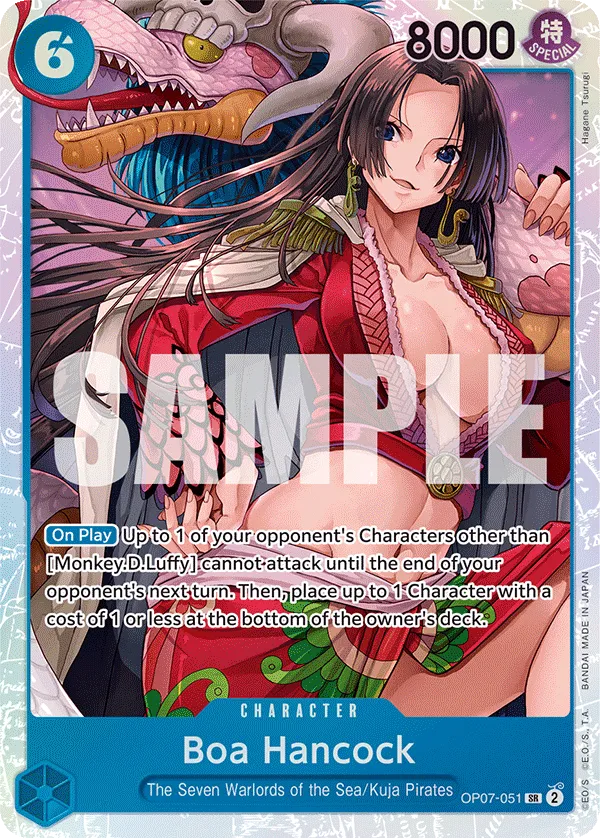
Blue Boa Hancock is a 5 Life card leader with an effect that allows you to draw a card whenever a Character is removed from the field by your effect. So two things to account for here, it doesn’t matter whose Character it belongs to that’s removed and KO, trash, or return effects all trigger Boa Hancock‘s effect.
So when building the Blue deck, we need to add as many cards with effects that activate our Leader, getting an extra draw once every turn will help put us ahead of the opposing play in resources, and eventually, they’ll struggle to keep up with us.
Boa Hancock Decklist


How to Play
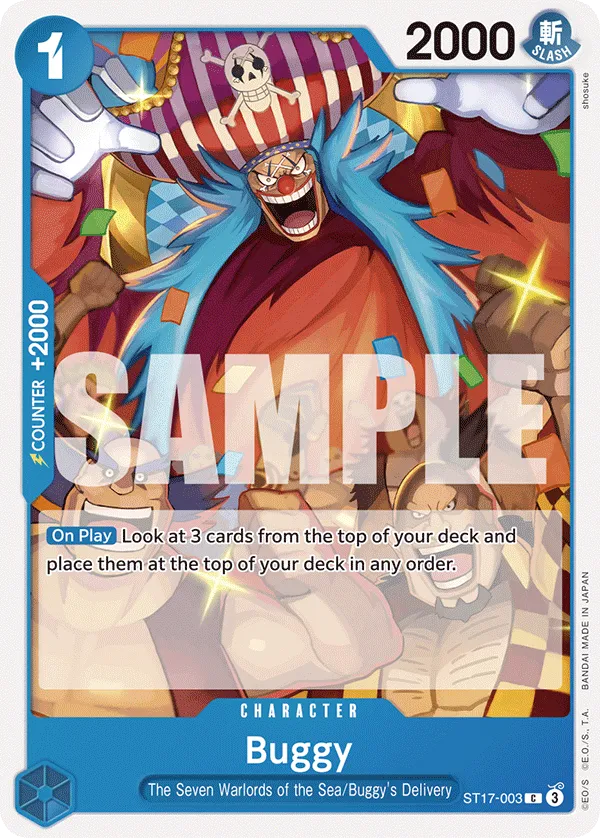
1-cost Searcher
1-cost Sengoku is an early searcher to play, helping us find one of our {The Seven Warlords of the Sea} type cards. 4-cost Jinbe is usually the Character to grab, but 4-cost Trafalgar Law is a great choice to have some control of the field.
Low-cost Blocker
1-cost Trafalgar Law is a low-cost blocker to protect your Leader and Characters from an opponent’s attack. Since he’s a {The Seven Warlords of the Sea} type card, you can search for him through cards like Sengoku or Jinbe.
4-cost Early Characters
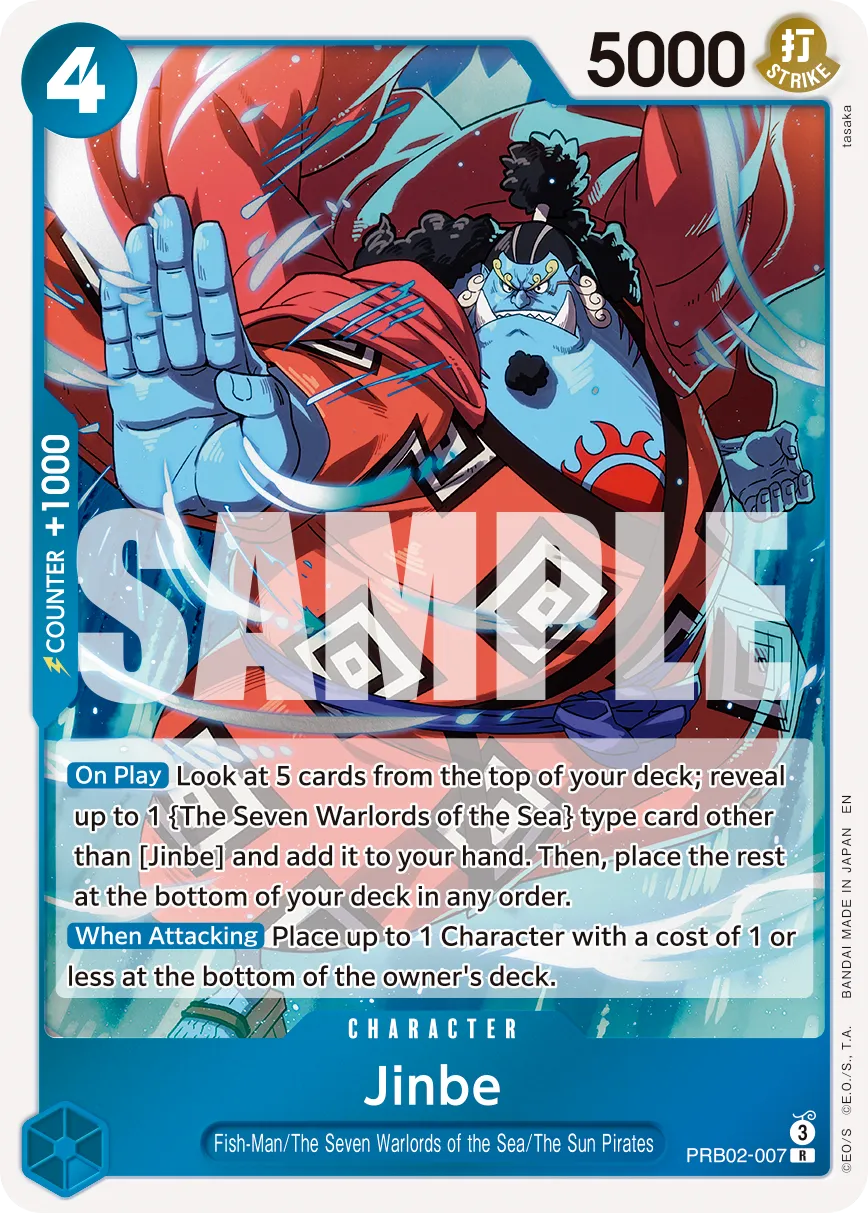
Jinbe is a 5,000 Character who looks at the top 5 cards of your deck to draw a {The Seven Warlords of the Sea} type card. You’re not losing on resources when going for the Jinbe play and even finding Boa Hancock or a +2,000 Counter card.
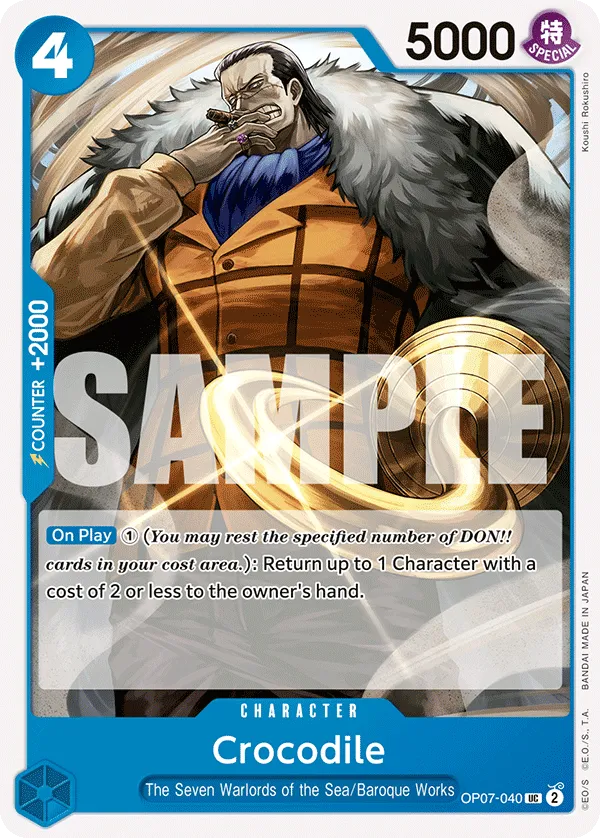
As for 4-cost Trafalgar Law, he’s an early control card that lets you return one of your Characters to your hand to return one of your opponent’s 4-cost or less Characters to their hand. This comes in handy in the early stages of the game to slow down the opponent’s pace and shift the field presence in your favor.
If you have 5 cards or less in your hand, Law is triggering your Leader’s effect, drawing you a card in the process.
Return Cards
The list has multiple other cards that trigger your Leader effect, just like the 4-cost Law. These cards help you keep control of the field while adding resources to your hand to enable a stronger late game.
6-cost Jozu is great for returning one of the opponent’s 6-cost or less Characters to their hand. However, you have to return one of your own Characters to your hand to activate this effect, so you usually want to go for low-cost Characters like Songoku or 1-cost Trafalgar Law. You easily replay them later in the game or use them as Counter cards.
Jozu is also great for triggering Leader Boa‘s effect and gaining an extra card draw. This will help you get ahead of the opponent in resources and control of the field.
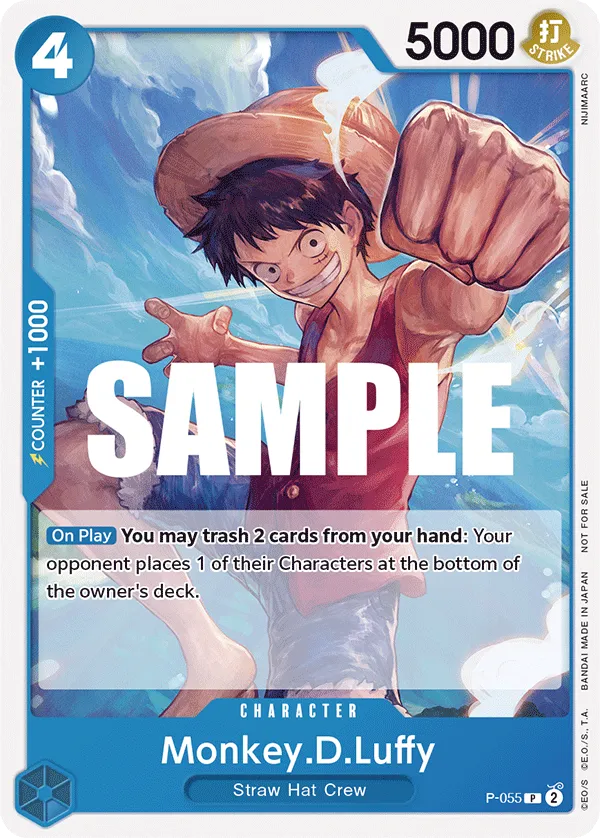
The 4-cost Luffy can require a setup, but can be destructive for the opposing player if they have a high-cost win condition in play. When played, you can trash 2 cards from your hand to force the opposing player to return one of their Characters in play to the bottom of their deck. This means, if your opponent has a low-cost Character in play, Luffy won’t find value from his effect, but if you’ve cleared the board, it forces the opposing player to remove a high-cost Character they heavily rely on. By returning the Character to the bottom of their deck, you’re triggering your Leader’s effect to draw a card, so although you’ve paid a heavy price to activate your Luffy‘s effect, you’re technically paying 1 card for it.
You can choose not to activate Luffy‘s effect and have him in play just for the 5,000 Power attacks.
Return Events
Gum-Gum Red Roc and Gravity Blade Raging Tiger are both returning Characters to the bottom of the opponent’s deck, which will trigger your Leader, Boa Hancock‘s draw effect.
Gum-Gum Red Roc is great for dealing with high-cost win conditions, removing them from play, and weakening the opponent’s upcoming turn.
Control Boa
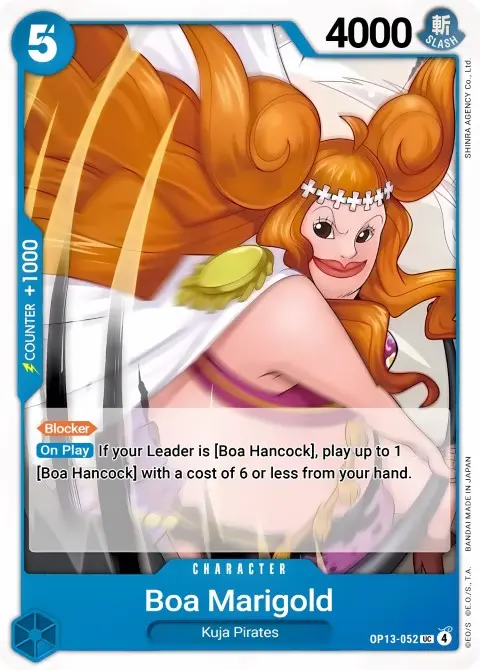
Boa Marigold is one of the newest cards in OP13 that supports the Blue Boa Hancock deck. She’s a 4,000 Power blocker that lets you cheat out a Boa Hancock with a cost of 6 or less. In this case, we’re playing Boa Hancock a turn earlier while developing a blocker to protect us from an attack.
The 6-cost Boa Hancock shuts down one of the opponent’s Characters from attacking on the upcoming turn, slowing down their pace, and buying you more time until you can establish a winning line. She’s an 8,000 Power Character, a massive heavy hitter to pressure the opponent with attacks, and at the same time, she lets you choose one of your Characters to place at the bottom of your deck. This usually isn’t a great effect to use, but it synergizes with your Leader’s draw effect, as you can return a low-cost Character like Sengoku to the bottom of your deck to draw a card.
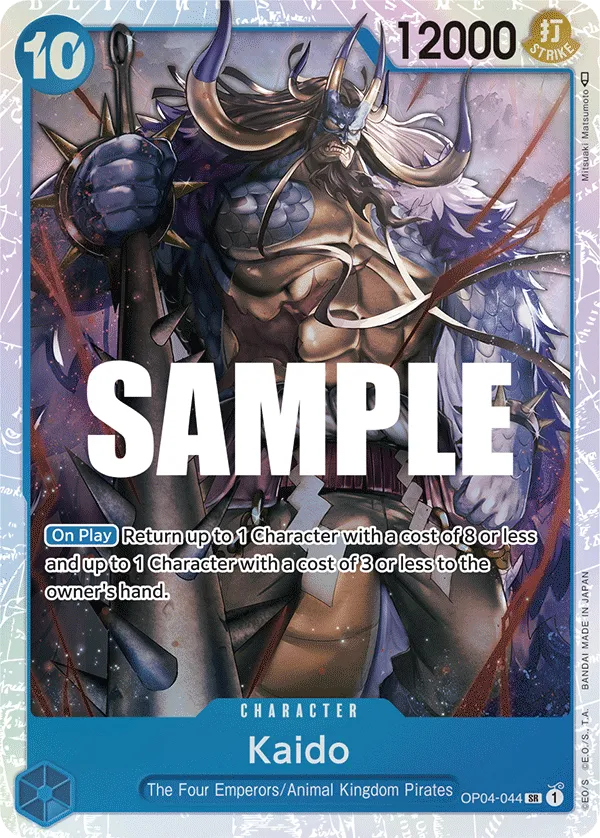
Late-Game Kaido
10-cost Kaido is a powerhouse, having 12,000 Power to go for heavy attacks. On Play, Kaido gets to return two of the opponent’s Characters to their hand, one being 8-cost or less and the other being a 3-cost or less. We get to remove one win condition for the opponent, and the 3-cost we remove can be a blocker, for instance, or if there’s nothing worth removing, we can opt to only return 1 Character.
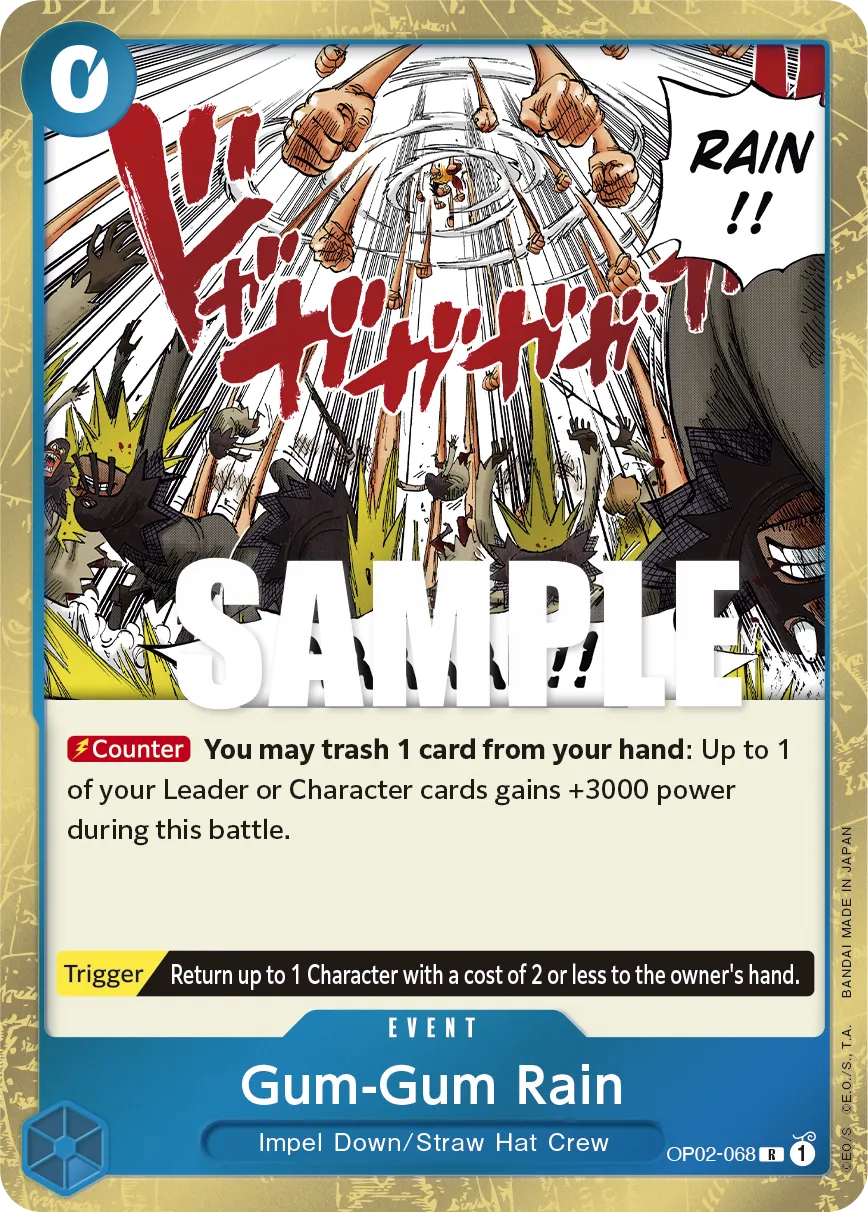
Counter Event
Gum-Gum Rain is great if you need Counter Power to protect your Leader or an important Character. You have to trash a card from your hand to gain +3,000 Power, so you’ll have to trash the least important card.
Mulligan Tips:
Going First: Sengoku, Boa Marigold, Boa Hancock.
Going Second: Sengoku, Trafalgar Law, Jinbe.
General Tips:
- Don’t be afraid to go low on cards. We want to activate Leader effect whenever possible for the draw effect. This means we need to use Counters early on to drop lower on hand size.
- Focus on controlling the field. We’re not an aggressive deck; we’re more focused on outvaluing the opponent and winning the late game.
- Protect heavy hitters. Characters like Jozu and Boa Hancock are great attackers to pressure the opposing player, so often, we’ll expend Counter resources to protect them from an attacker.
Turn-Based Gameplay
Going First
- Turn 1 (1 Don): 1-cost Sengoku
- Turn 2 (3 Don): 1-cost Sengoku or 1-cost Law.
- Turn 3 (5 Don): Boa Marigold, 4-cost Trafalgar Law, Pudding, or Jinbe.
- Turn 4 (7 Don): Jozu or Boa Hancock.
- Turn 5 (9 Don): Jozu, Boa Hancock, or Gum-Gum Red Roc.
- Turn 6 (10 Don): Kaido.
Going Second
- Turn 1 (2 Don): 1-cost Sengoku
- Turn 2 (4 Don): Jinbe, Trafalgar Law, or Pudding.
- Turn 3 (6 Don): Jozu.
- Turn 4 (8 Don): Jozu, Boa Hancock, or Gum-Gum Red Roc.
- Turn 5 (10 Don): Kaido.
Other Cards to Include
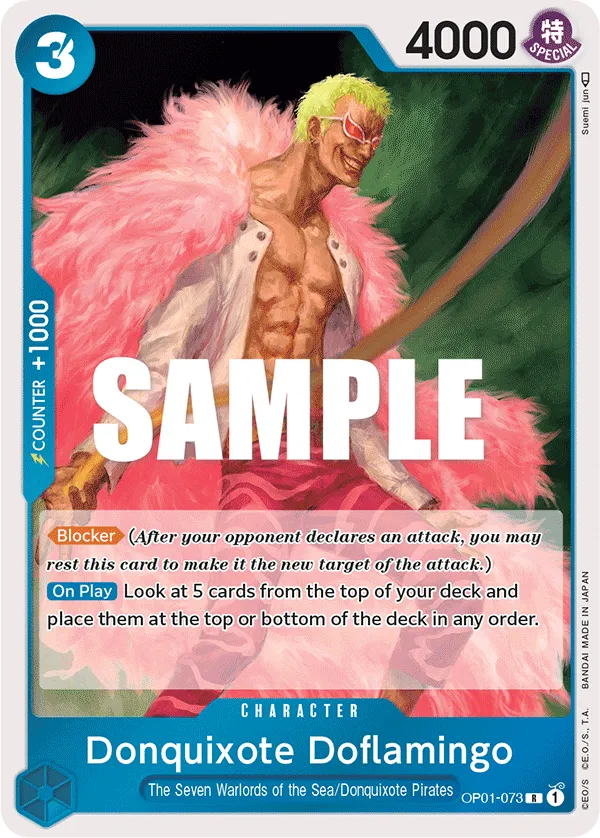

- Doflamingo is a low-cost Warlord of the Seas Blocker that lets you reorder the top 5 cards of your deck to start drawing the crucial cards first.
- Gravity Blade Raging Tiger can remove two of the opponent’s 6-cost or less Characters to put the opposing player behind on the field. It’s also triggering your Leader’s effect for the additional draw.
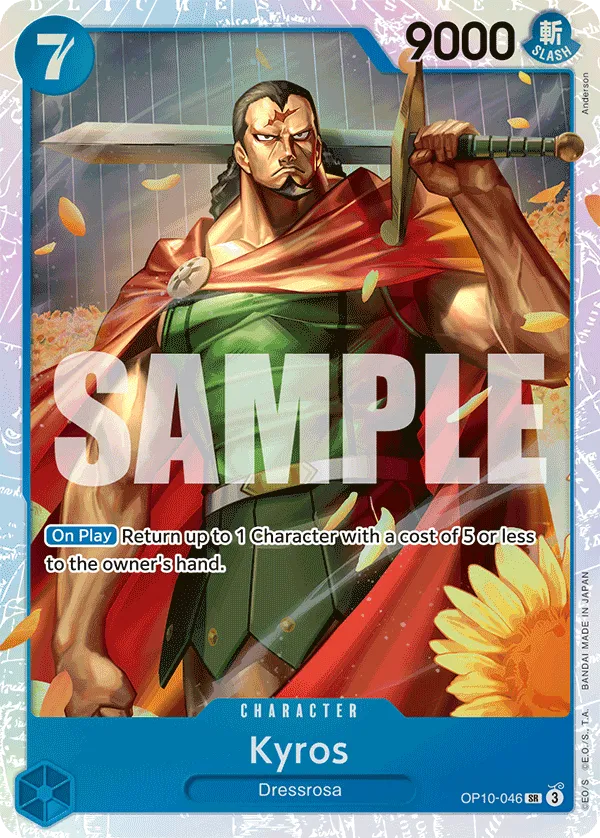
- Kyros‘ effect returns one of the opponent’s Characters with a cost of 5 or less to their hand. So it’s weaker than Jozu‘s return effect, but it doesn’t force you to return one of your Characters. Kyros is also a 9,000 Power attacker, a bigger threat and more challenging to remove.
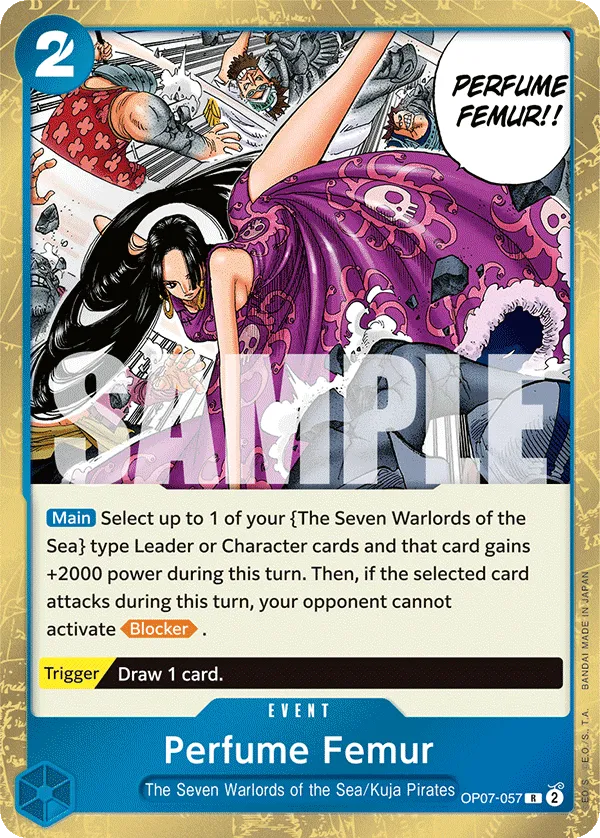
- Perfume Femur is great as a finisher event, allowing you to bypass the opponent’s blocker and go for a straight attack on their Leader to win the game.
Closing Words
Although Blue Boa Hancock was overshadowed by Blue Doflamingo, she’s a strong value Leader with a lot of support cards. Future EB03 expansion is also bringing new cards for Boa to up her strategy!
This is it from me! If you want to keep up to support us, please consider subscribing to Spell Mana!


